Learn how to create personalized back to school tees for your kids this year with your Cricut Explore Air 2 machine. Virtual learning may not be what you or your kids desire this year, but that doesn’t mean that you can’t create one-of-a-kind back to school tees to commemorate the first day of that virtual life!
This is a sponsored post written by me on behalf of Cricut. All opinions are 100% mine.

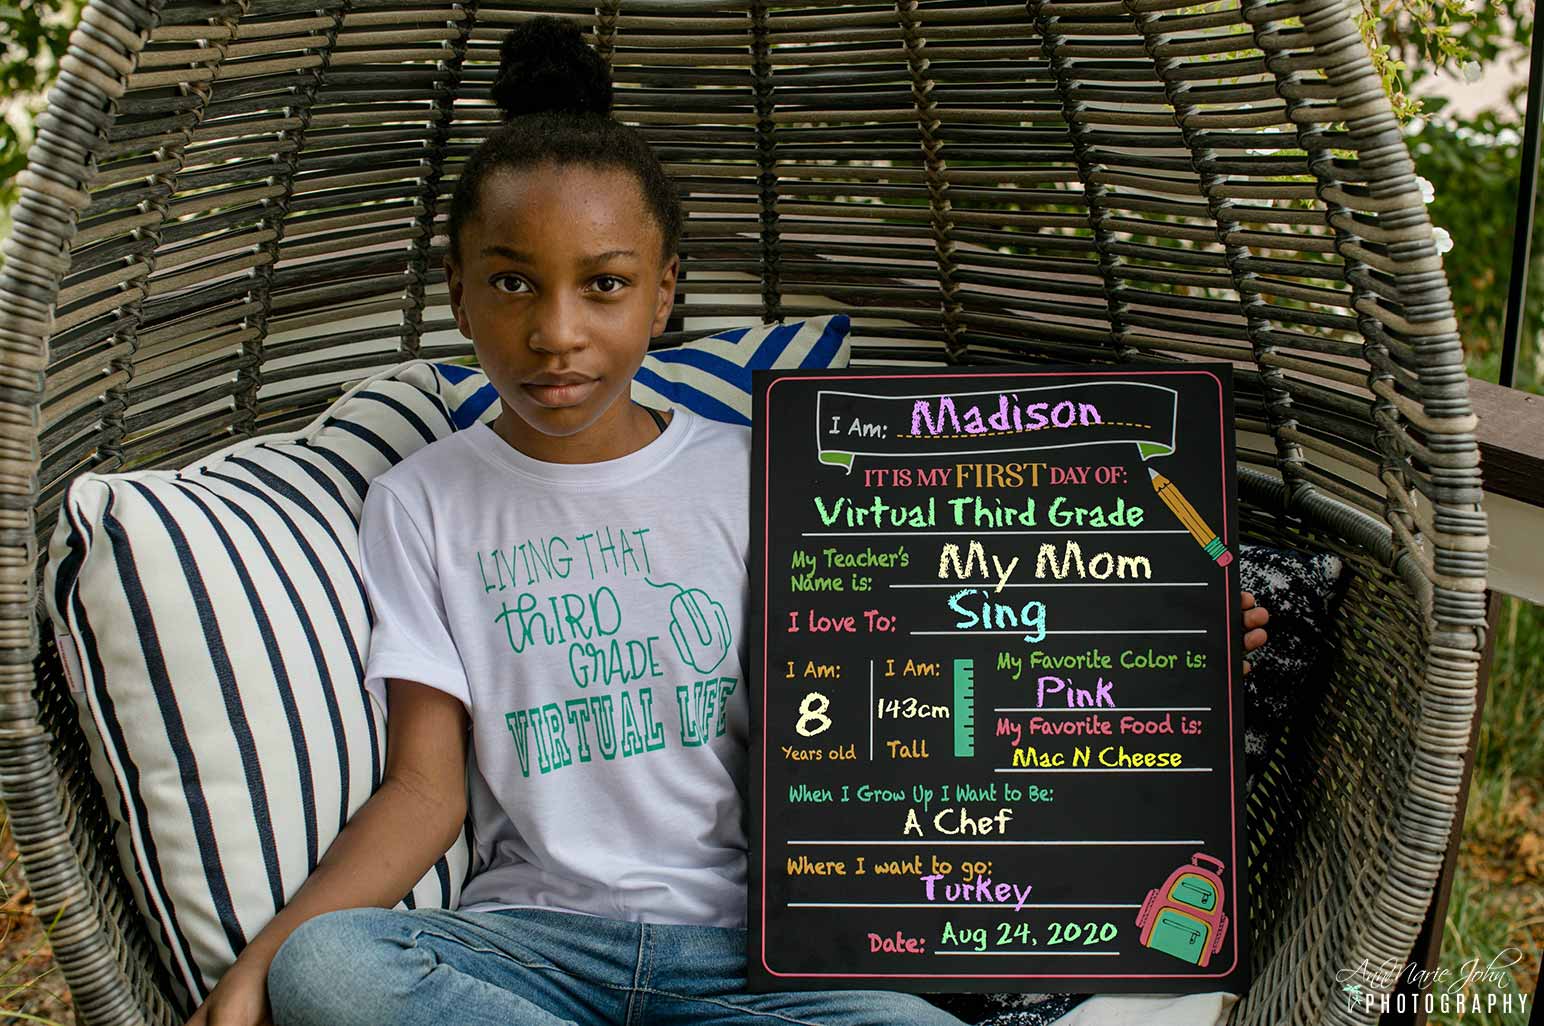
School is different this year for us, and maybe for most around the country. For the first time in her eight years, Madison will not be in the classroom with her friends and teachers. Her school has implemented virtual learning in their hope of flattening the curve and stomping out the pandemic that is happening worldwide, or at least in Colorado Springs.
Over the summer, I’ve put both my Cricut Maker, Cricut Explore Air 2, Cricut Joy, and EasyPress to use. Being on quarantine meant that I had more time than usual on my hands, so I could do more than I usually would. I showed how easy it was to create personalized outdoor mats with your Cricut Joy, recycled all my Cricut Infusible Ink Sheets scaps to make a one of a kind tie-dye canvas tote, and even made the perfect summer watermelon tote. I turned Madison’s artwork into wearable art, and she also created her own canvas art, and we made unicorn shoes.
However, it’s back to school time, and a yearly tradition of ours is to have a tee symbolizing the start of the new school year and a new grade. While it is a new school year and Madison will most definitely be entering the third grade, things are a lot different this year. This year learning will be done virtually, all online instead of in school where she will socialize with her old friends, make new friends, and interact with a new third-grade teacher.
While that’s a big con, there are a few pros to this entire situation, such as us not having to purchase the many supplies that we would have had to, had she been in school. So less personalizing. If I did need to personalize her backpack, pencil cases, folders, etc., then the Cricut Joy would have been my go-to for such a project as it’s perfect for the job. What I did do to make things seem semi-normal, was to create her back-to-(virtual)-school tee that is not just unique, but is precisely what is happening right now.

Here’s what you’ll need:
Butcher Paper
White Cardstock
Heat Resistant Tape (optional but preferred)
Lint Roller
DIRECTIONS
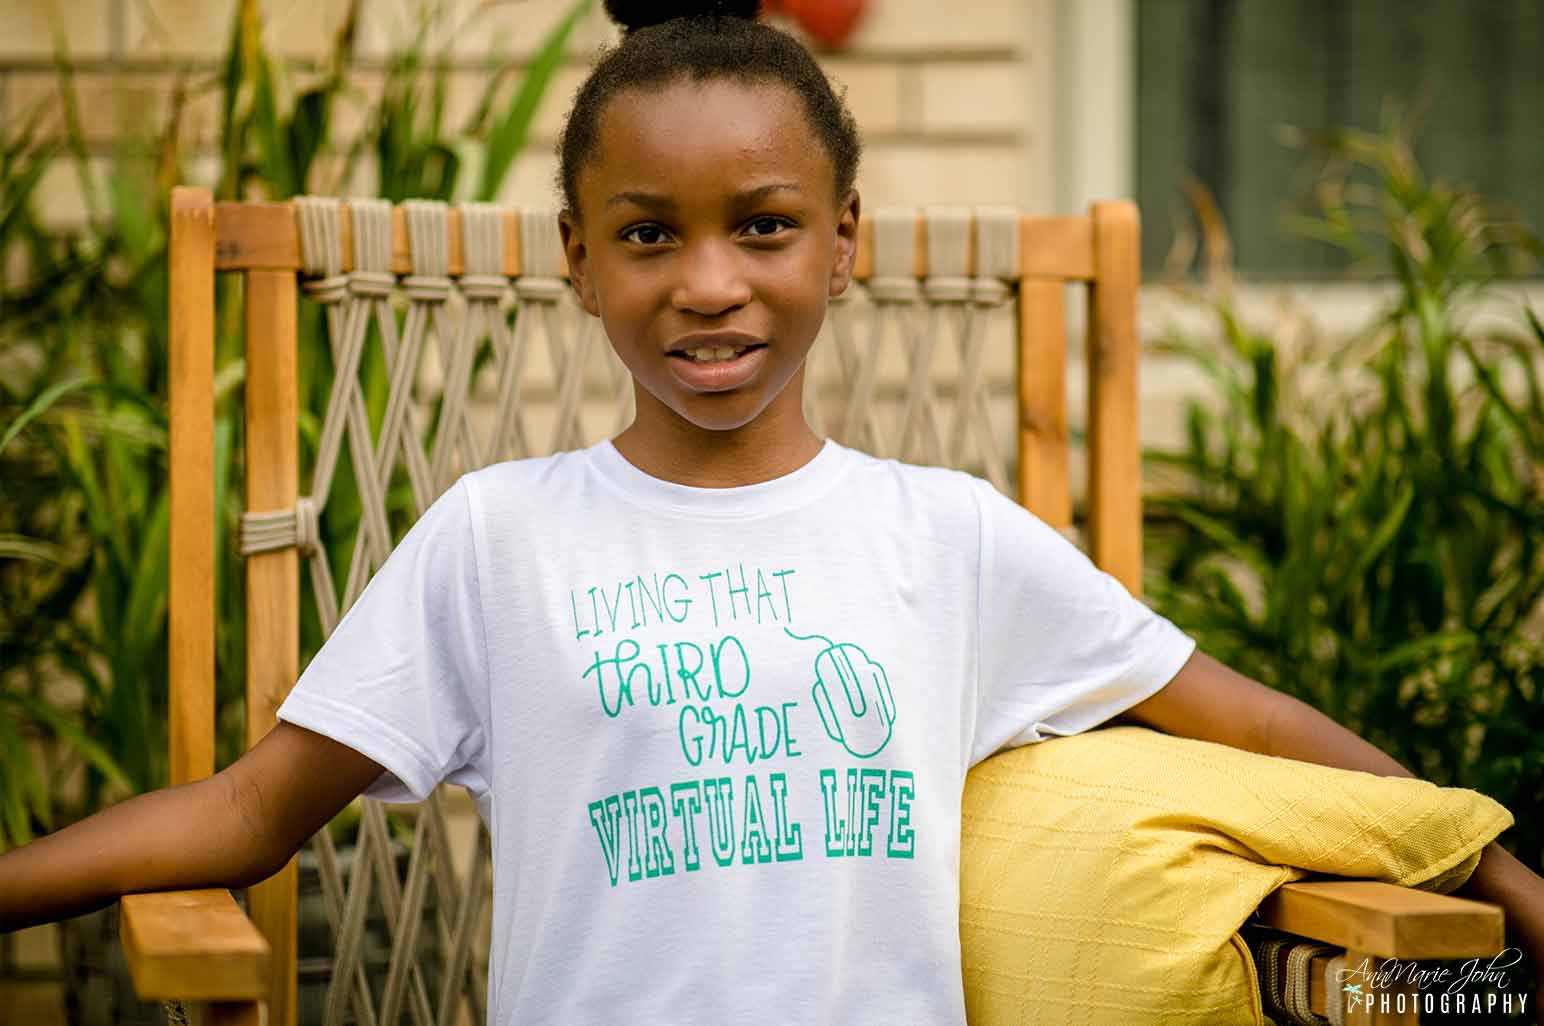
For this project, I’m using the green (looks more like blue when you take it from the package) in the Mermaid Rainbow Infusible Ink Transfer Sheets.
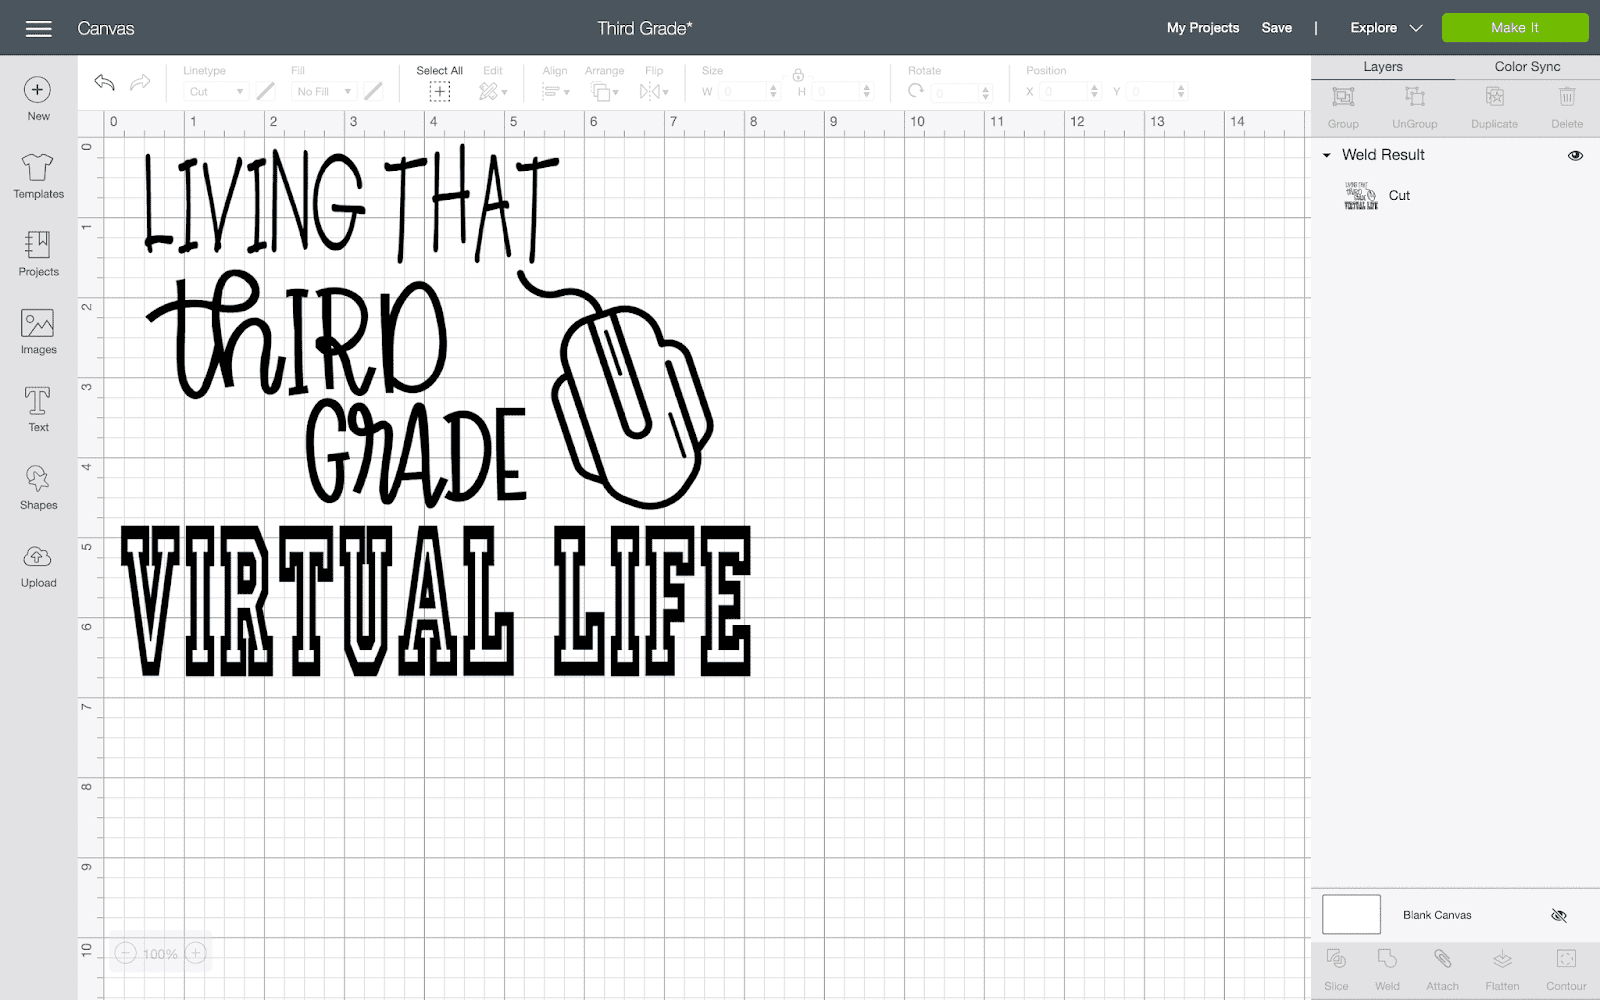
1. Open Cricut Design Space and start a new project. Cricut Design Space has a lot of pre-made designs that you can choose from. However, when looking, there wasn’t any available for third-grade virtual learning, so I decided to make my own.
2. Choose a font that you love, and you can add images (graphics) to your design as well. I was able to find “Third Grade” pre-made and chose different fonts for “Living That Virtual Life”. I also found a computer mouse as that’s what she’ll use during her virtual learning, so I decided to add it for more depth. Once the design was ready, and we were both satisfied with it, we decided to create it.
3. To cut your infusible ink transfer sheets, you’ll need to turn your dial to custom and from the menu, choose infusible ink sheets. Place the sheet with the shiny side down and the pattern or colored side up, and be sure to mirror your project.
(Weeding Infusible Ink Transfer Sheets has to be one of the easiest materials to weed, so a weeding tool isn’t vital as you merely fold the design and weed by hand.)
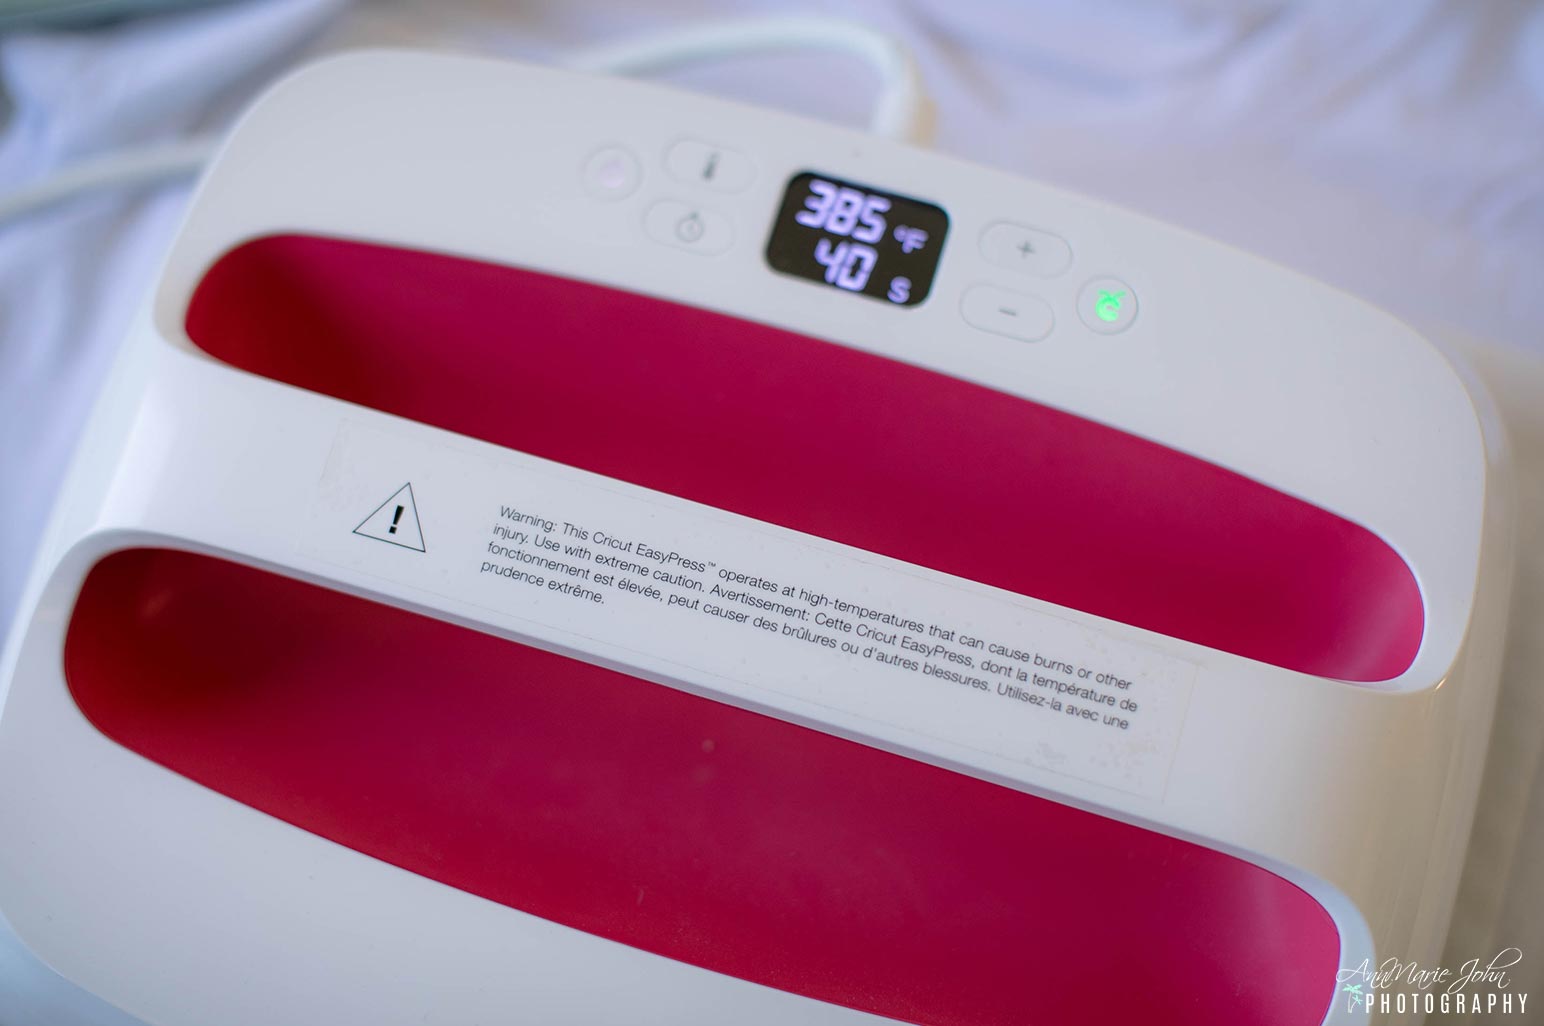
4. Grab and prep your tee by removing all lint with a lint roller. (I prefer using Cricut Blank Tees as I find that the color transfers a lot more vividly with these tees than the cheap ones I would purchase in other stores.) With your EasyPress at the right temperature, use the Cricut Heat Guide if unsure, lightly press your tee to remove all wrinkles.
5. Place your EasyPress Mat on the inside of your tee with white cardstock on top of the mat; this prevents the ink from transferring and ruining your mat.
6. Place your Infusible Ink Transfer Sheet with your weeded design color side down on your tee, and tape in place with your heat resistant tape. Place the butcher paper over the design then press with your EasyPress making sure to cover the entire design with your press for 40 seconds.
7. Once your timer goes off, remove the EasyPress. Allow to cool and remove the butcher paper along with the transfer sheet, and voila, you’re all done!
It really doesn’t get any easier than that, and you and your child would have a unique one-of-a-kind tee commemorating the first day of school. So skip buying those expensive tees, that you’ll probably see over and over again on other kids, and make one of your own. Create your own design in Cricut Design Space, let your imagination run wild, or use one of the pre-made designs and get creative!
If you’d love torecreate this exact t-shirtfor your virtual learning third-graders, you can find this and more in my Design Space.
PIN THIS POST TO YOUR FAVORITE PINTEREST BOARD.