
Today I want to share with you how you can turn your children’s artwork into wearable art using the Cricut Easy Press and their infusible ink markers.

Another week has come and gone, and we’re still stuck indoors, and it’s now official, we’re grounded for the entirety of 2020. That means that I have canceled all my travel plans, and we’re staying put right here at home. For someone who enjoys traveling as much as I do, it truly hurt my soul to cancel all my trips, but I know that in the long run, it’ll be better when I’m ready to soar the friendly skies once again.
In the meantime, Madison and I have been crafting up a storm. If you’re new to the blog, then you’ve got to check out our canvas art. We’ve also made outdoor mats, candles, bath soaps, and soaks. Now, instead of spending my money on travel, I’ve found myself purchasing craft supplies to keep us occupied at home.
With Mother’s Day right around the corner, Madison wanted to make something special for me. She’s always drawing and placing her artwork on the refrigerator, and this time we decided that we were going to transform one of her artwork into something that I could wear. After all, it’s only a matter of time before one of her art pieces finds its way into the trash to make way for something new. This way, it’ll live on forever.
This project was super easy, and I couldn’t be more thrilled with the way it turned out. If you’d love to turn your own child’s artwork into wearable art, then this project is for you!

Here’s what you’ll need:
SUPPLIES
Cricut Infusible Ink Freehand Markers 2.0 Basics
Cricut Infusible Ink Freehand Markers 2.0 Tropical
Plain copy paper
Butcher Paper
Cardstock
Lint Roller
*Your Kids Imagination

DIRECTIONS
*Now there are two ways to do this, and I’m going to teach you the way to do this if you’re going to have words on your artwork.*
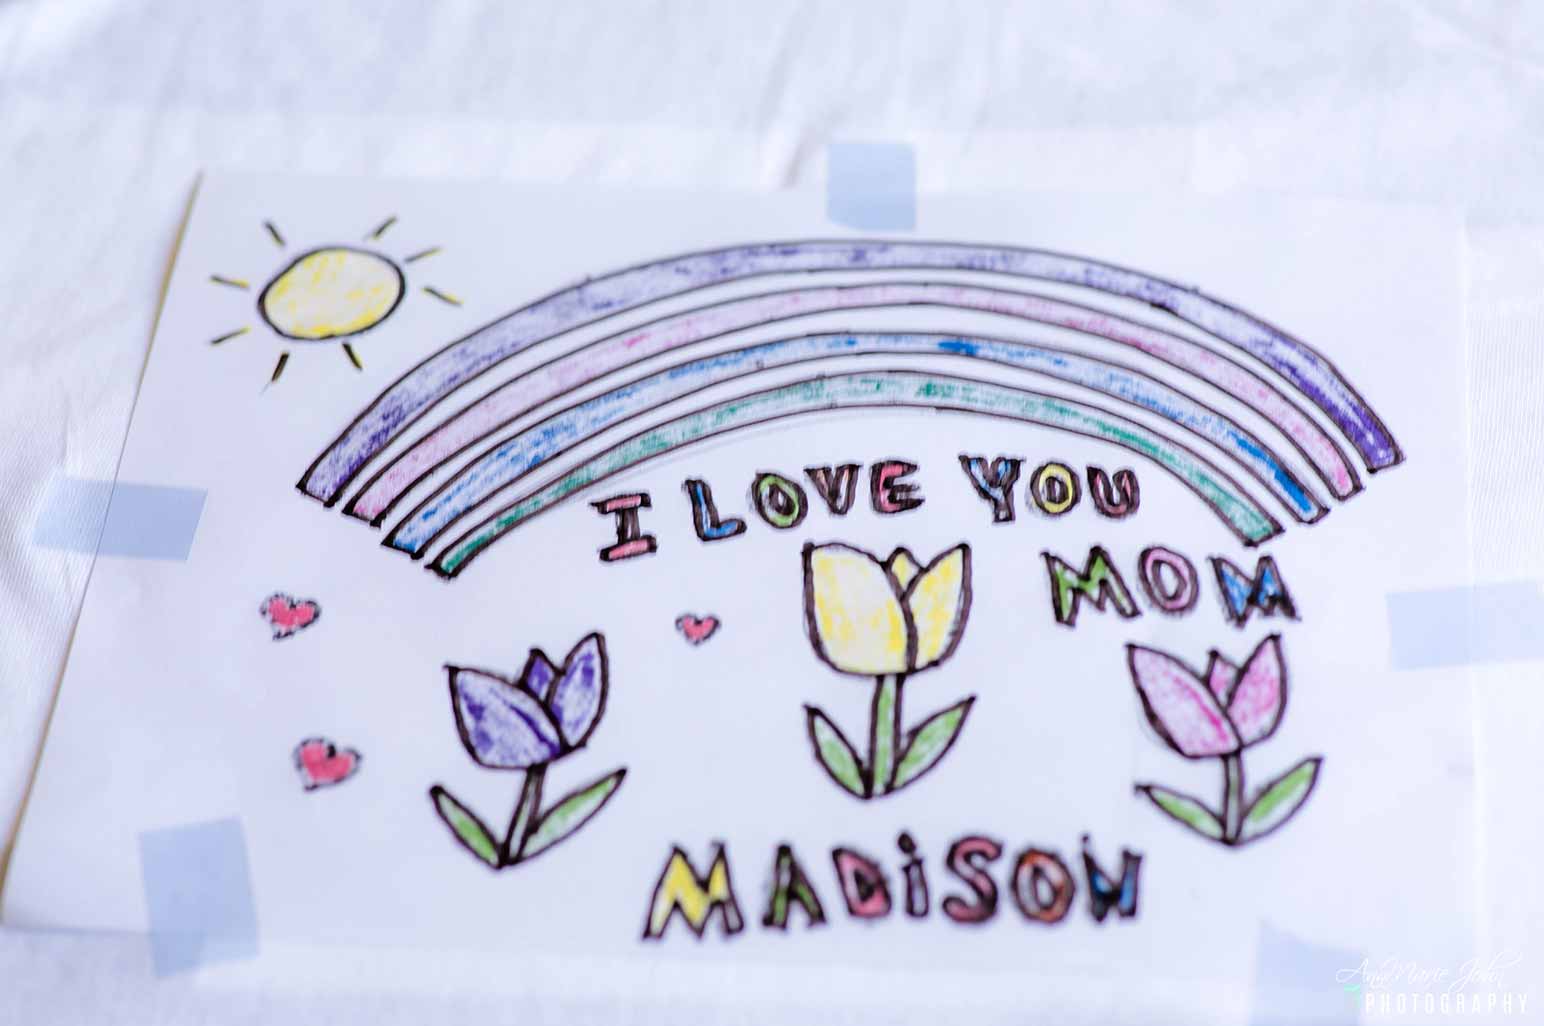
STEP 1: Begin by having your child draw whatever they’d like on plain copy paper. For our project, Madison decided to draw a rainbow with tulips. Start off drawing with a pencil, then with your basic freehand markers, trace over your pencil line with the black marker.
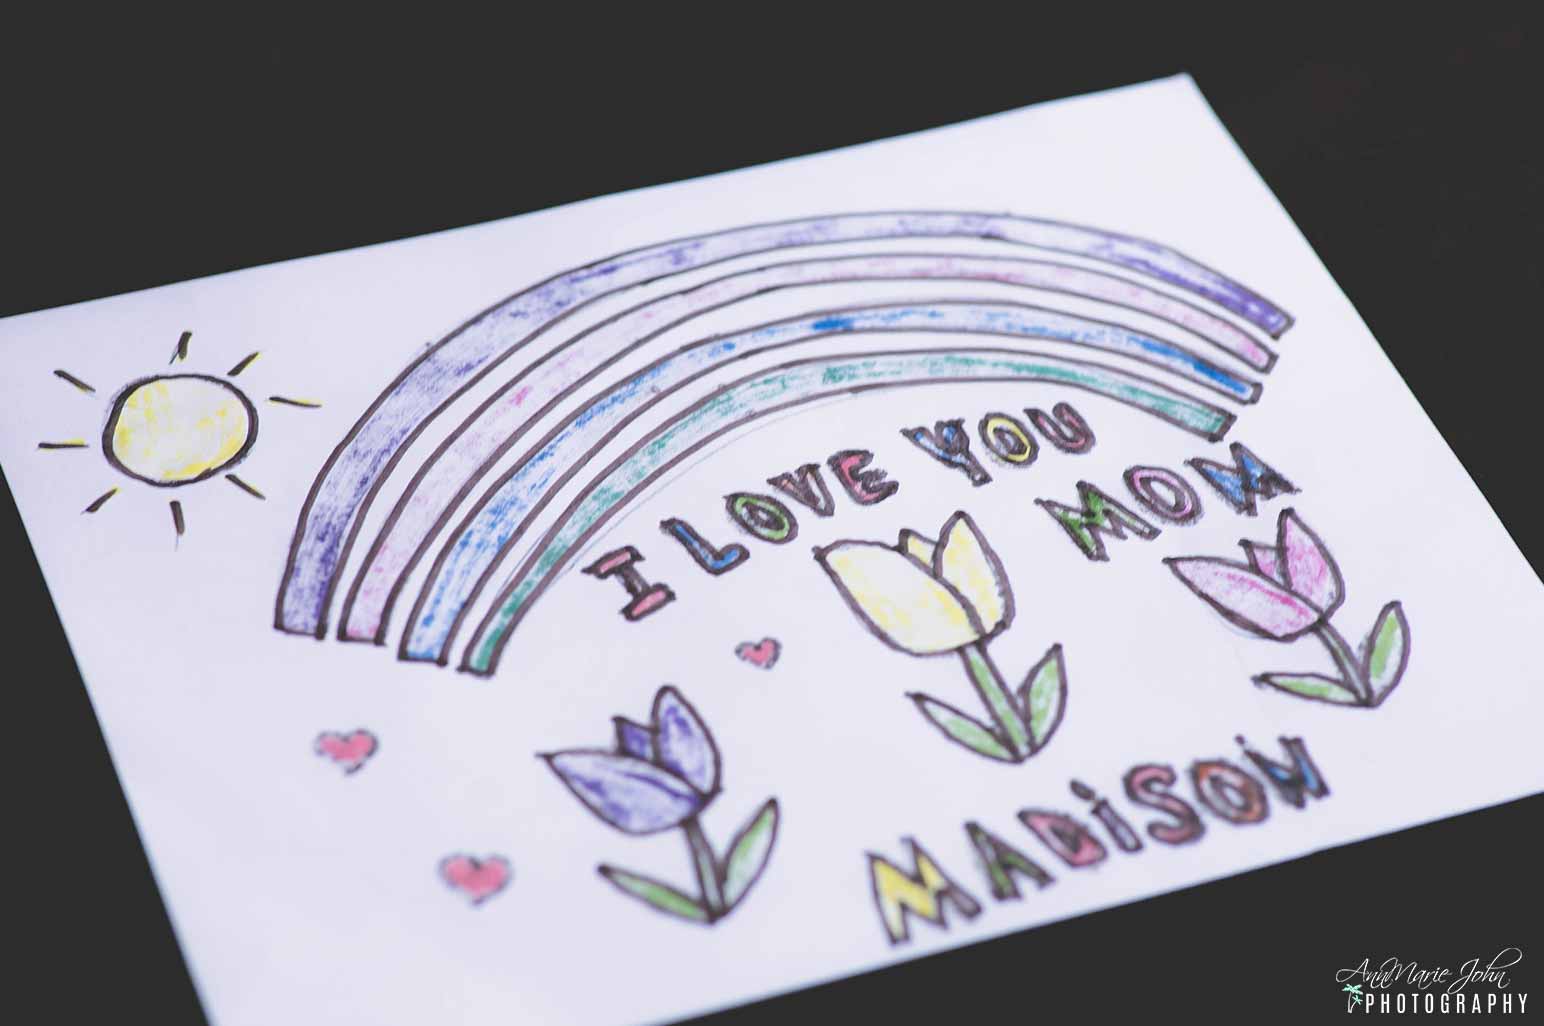
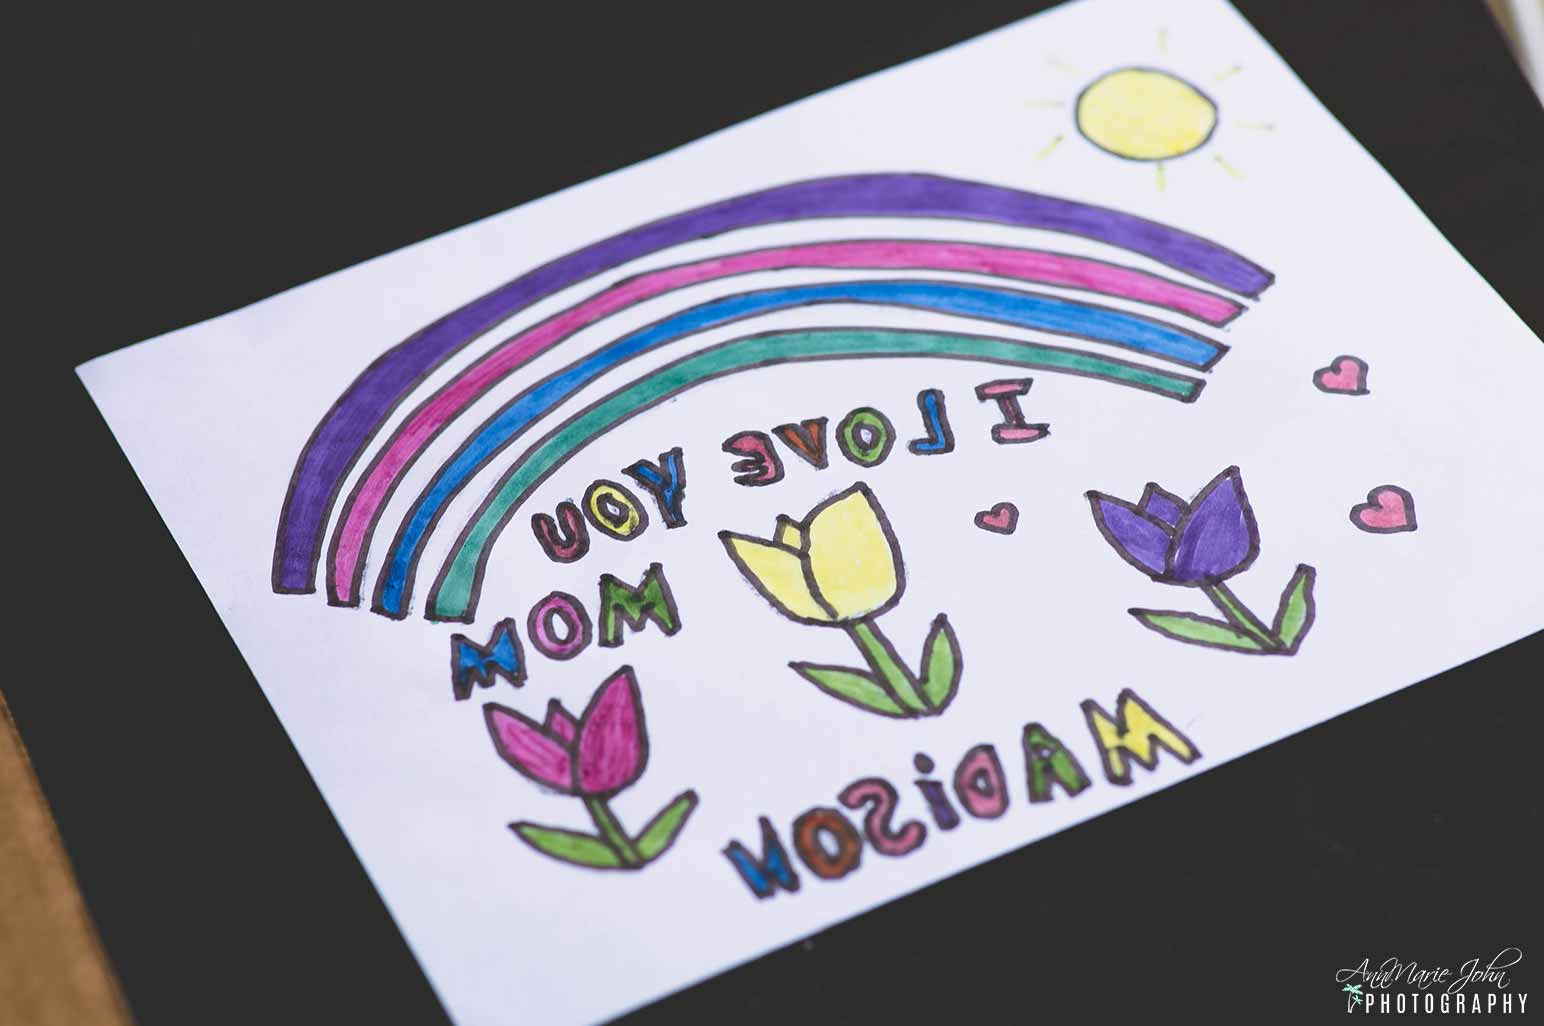
STEP 2: Flip your paper over and now color in your artwork with your basic and tropical markers. You don’t necessarily have to use both packages, but we found that the basic was just that, your primary black, red, vivid blue, green, and yellow. The tropical colors consisted of party pink, purple, sky blue, tangerine, and green apple. You can retrace the lines with the black once again so that you have an outline to follow, but on plain copy paper, you’ll be able to see it clearly.
*If you decide not to add words to your artwork, then you can trace and color all at the same time without flipping your paper over*
STEP 3: Here comes the fun part! Prep your tee by removing all lint with your lint roller. Set your EasyPress at the right temperature and lightly press your tee to remove all wrinkles. If unsure as to what temperature you need, use the Cricut Heat Guide.
STEP 4: Place your EasyPress Mat on the inside of your shirt, then place white cardstock on top of your mat to prevent ink transfer from ruining your mat.
STEP 5: Tape your artwork with the colored side down on your t-shirt with the heat resistant tape. This will keep it in place while transferring the ink. You can place it wherever your heart desires, although centering it is always a good idea as well. Next, put some butcher paper over your artwork.
STEP 6: Press with your EasyPress machine according to the guidelines from your Cricut Heat Guide. In my case, we needed our EasyPress machine to be at 385°, and our shirt pressed for 40 seconds. Make sure that you cover the entire design when pressing. If you’re not happy with the ink transfer, you can press again until you’re satisfied, but wait about 30 seconds between pressing.

STEP 7: Allow to cool and remove the butcher paper, along with the copy paper with your child’s artwork, and admire their handiwork. What you’ll be left with is a transfer of their artwork on a tee that you can wear for a lifetime.
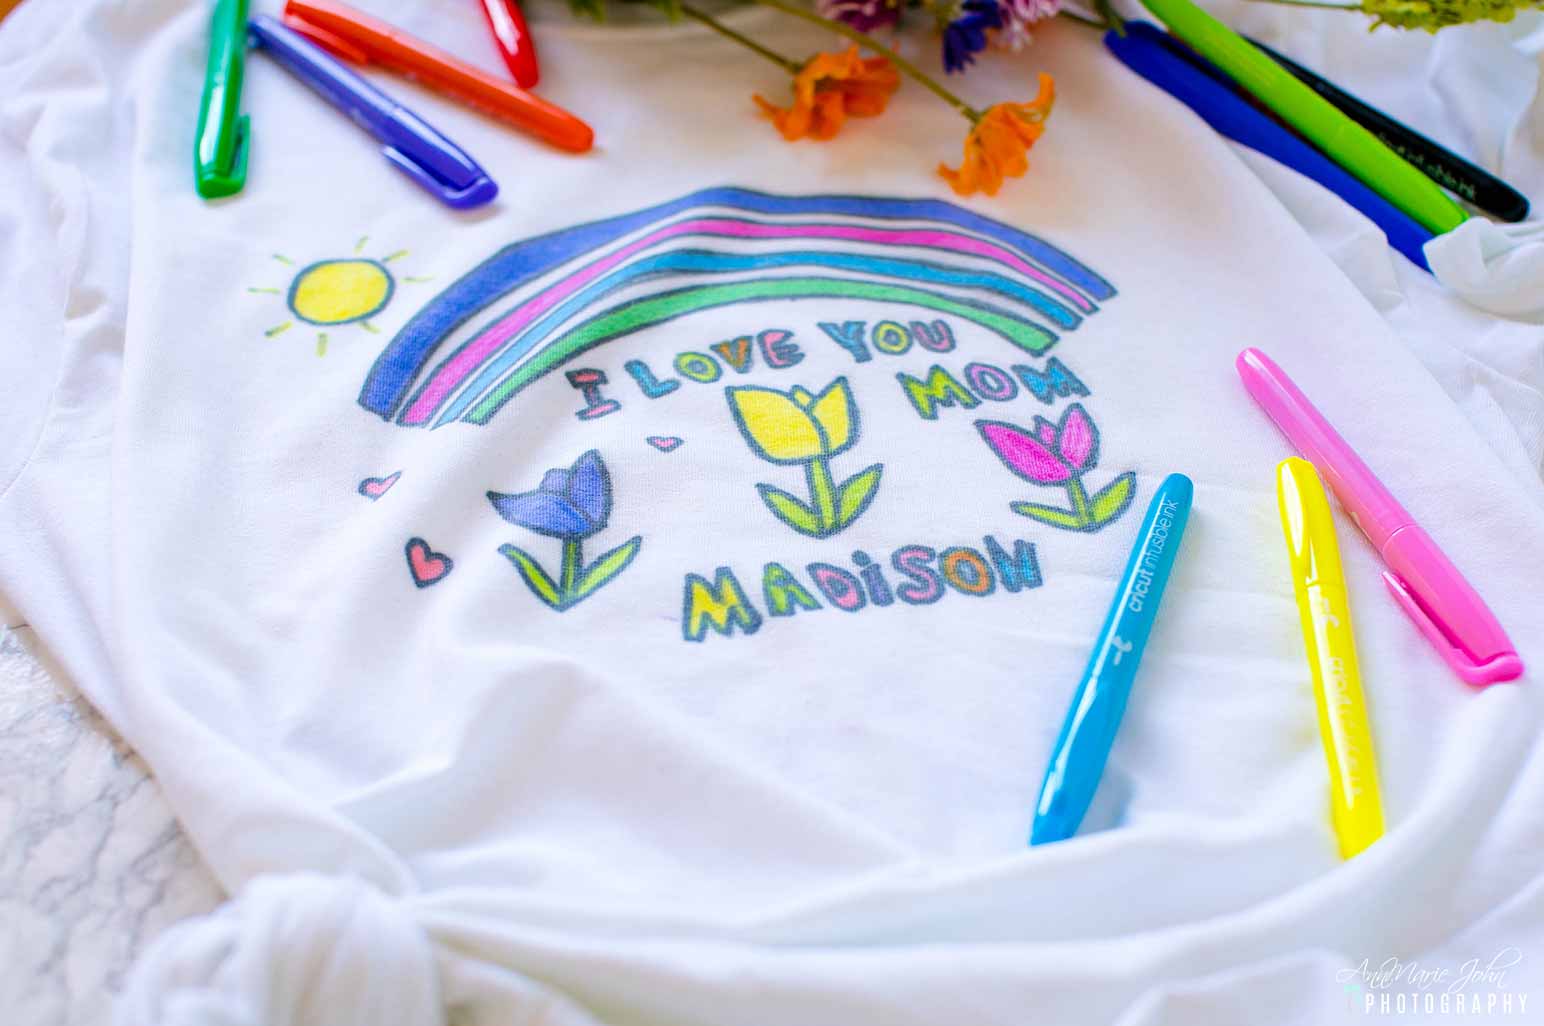
This is, by far, one of the easiest ways to turn your children’s artwork into actual wearable art. Instead of hanging their artwork on the fridge, give it a badge of honor and wear it instead. You can not only do this on tees, but also on totes and even shoes. The possibilities are endless with the Cricut Infusible Ink Freehand Markers and the Cricut Easy Press. Think of all the grandparent’s gifts that you can create and send to them. They’re going to love it, and so will you!
PIN THIS POST TO YOUR FAVORITE PINTEREST BOARD.


