
Making your own personalized outdoor mat is much easier than you think with Cricut Joy! Once you’ve made a mat, you’ll never go back to buying them premade ever again, as you can now have the design that you’ve always wanted.
This post is sponsored by Cricut and the new Cricut Joy, but all opinions are mine alone.

When Cricut released their Cricut Joy, I couldn’t wait to get my hands on it. What I was especially hoping to use was their smart vinyl. There have been projects that I’ve wanted to create, but not having the correct length of vinyl or needing to cut and attach using my Cricut Explore was a pain.
One thing I love about Cricut is that anyone can become a crafter because it’s just so user-friendly. I love decorating my home, adding little accents throughout, like my canvas art, and Cricut has made it easy for me to do so. Every season I would change out my decor, including my outdoor mats, but this year I decided that instead of buying one, I’d just make one. They couldn’t be that difficult, right?
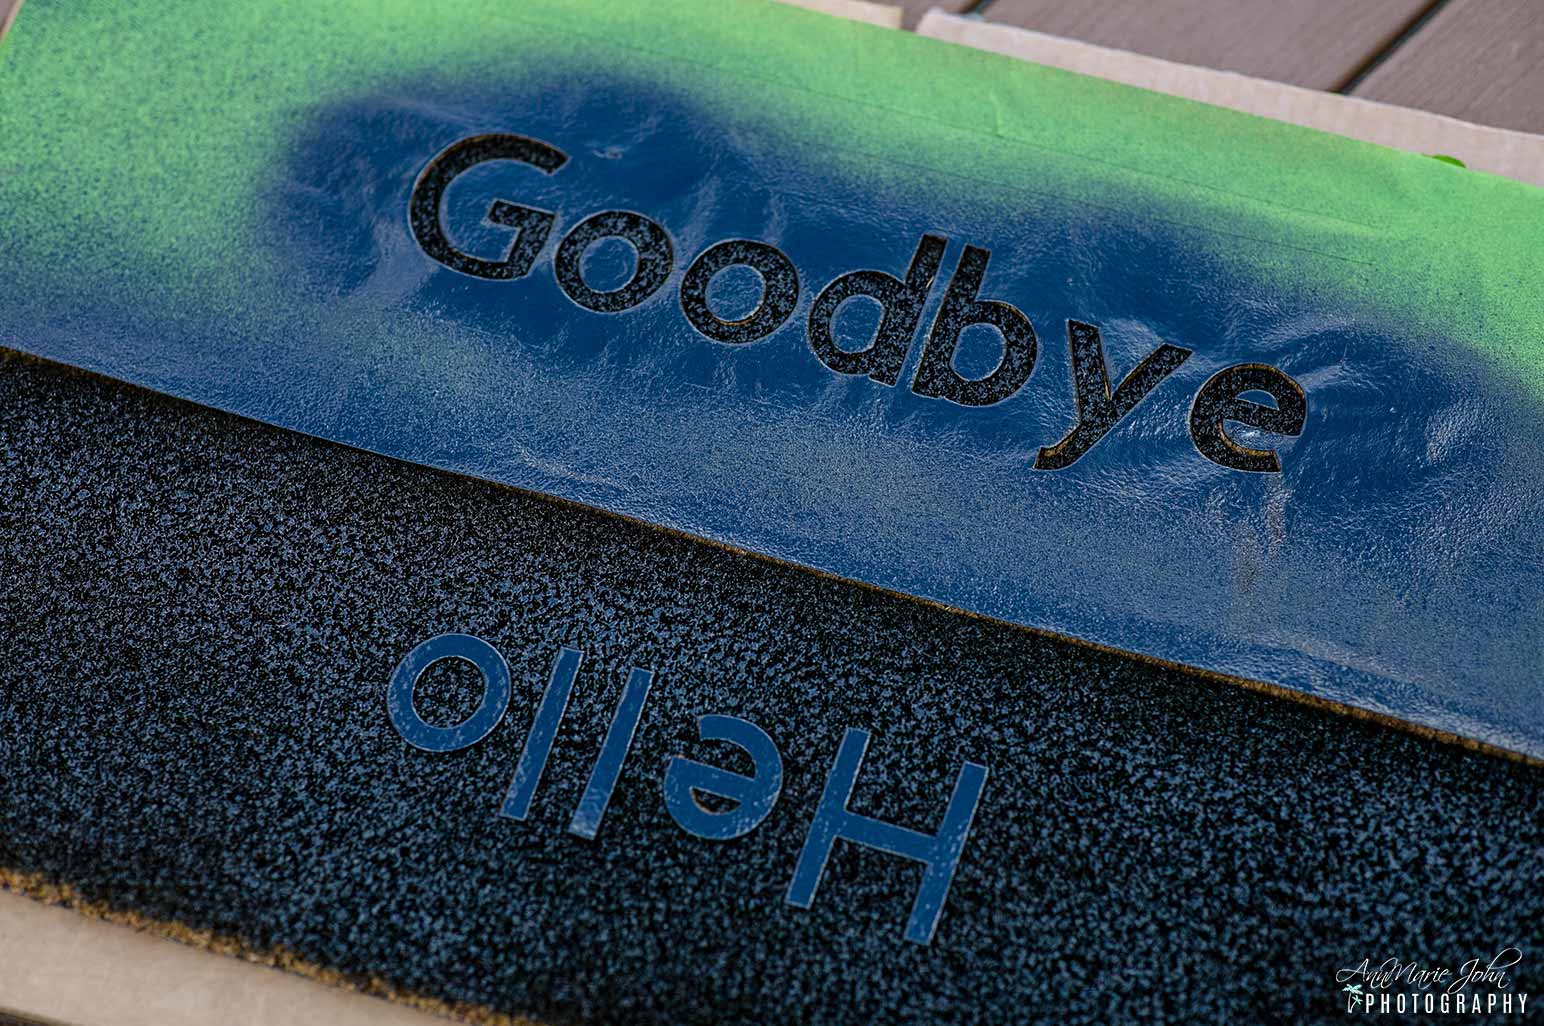
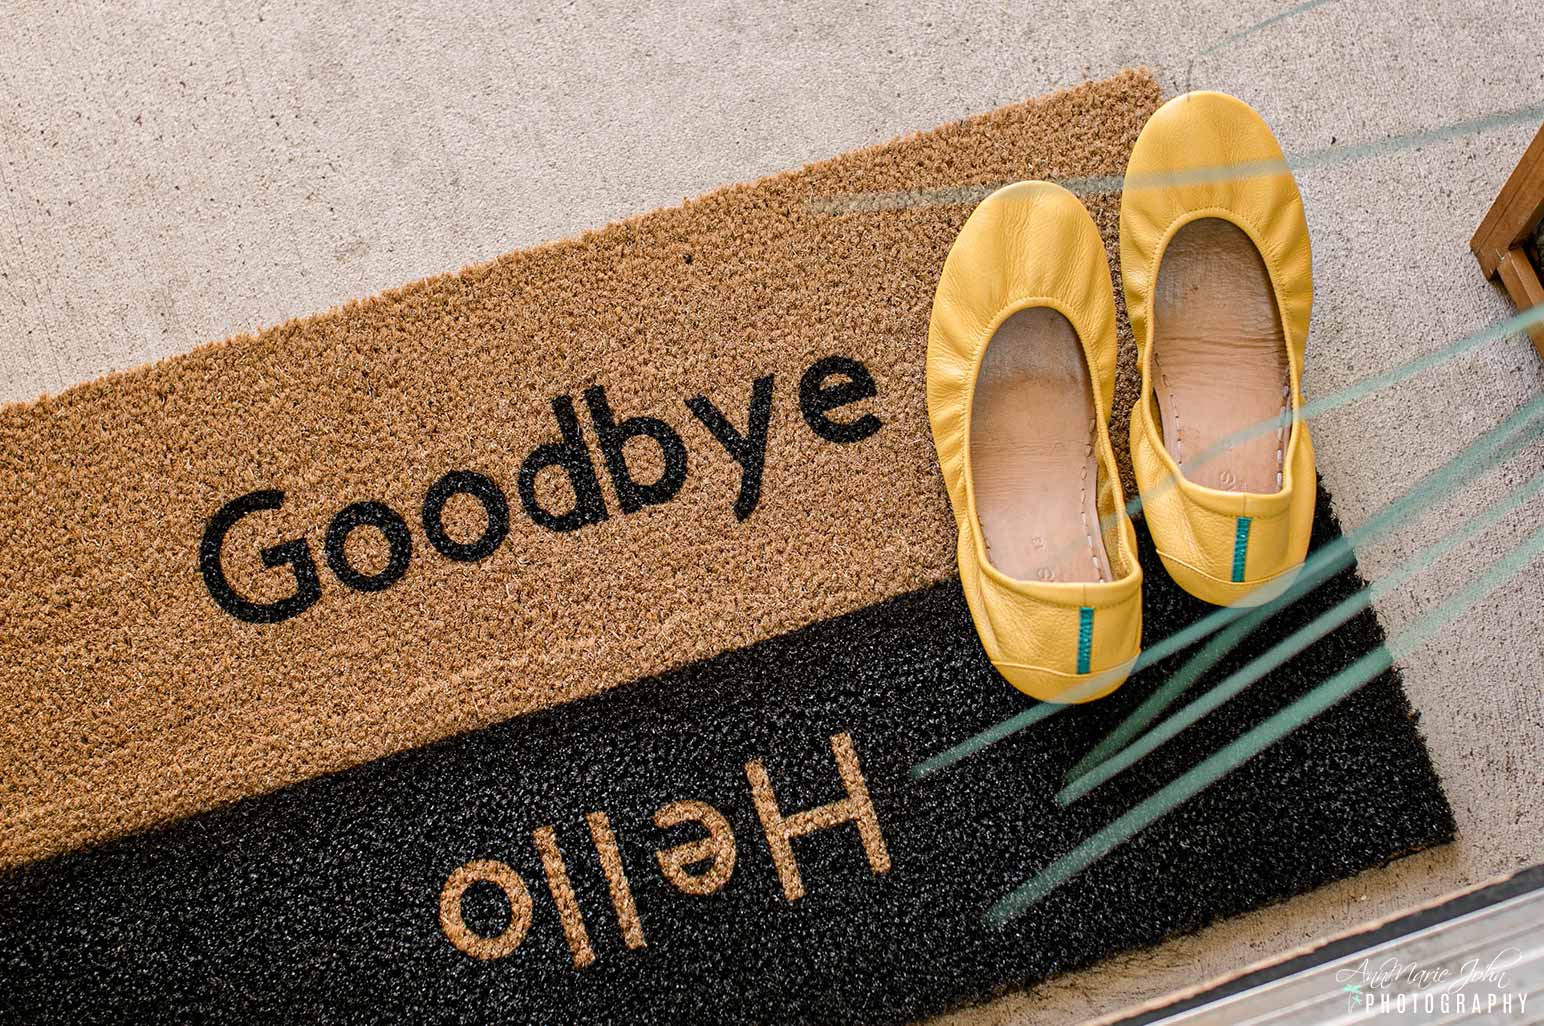
My original idea was to personalize a mat welcoming guests to our home and including stick figures of ourselves. So a simple “Welcome to Our Family,” but my son decided that a Hello/Goodbye mat would be easier. He had seen one at his sisters’ apartment and loved it, so we decided to recreate it instead.

It was a lot easier to get it done that I thought. I’ve always wanted to make a personalized or unique mat for our household. However, every time I’ve looked at a tutorial for personalized mats, they’ve almost always included stencils. It got me thinking, couldn’t I use Cricut Vinyl as a stencil and do one for myself? I have to say that it worked flawlessly, and now I can’t see myself ever buying a store-bought doormat ever again.
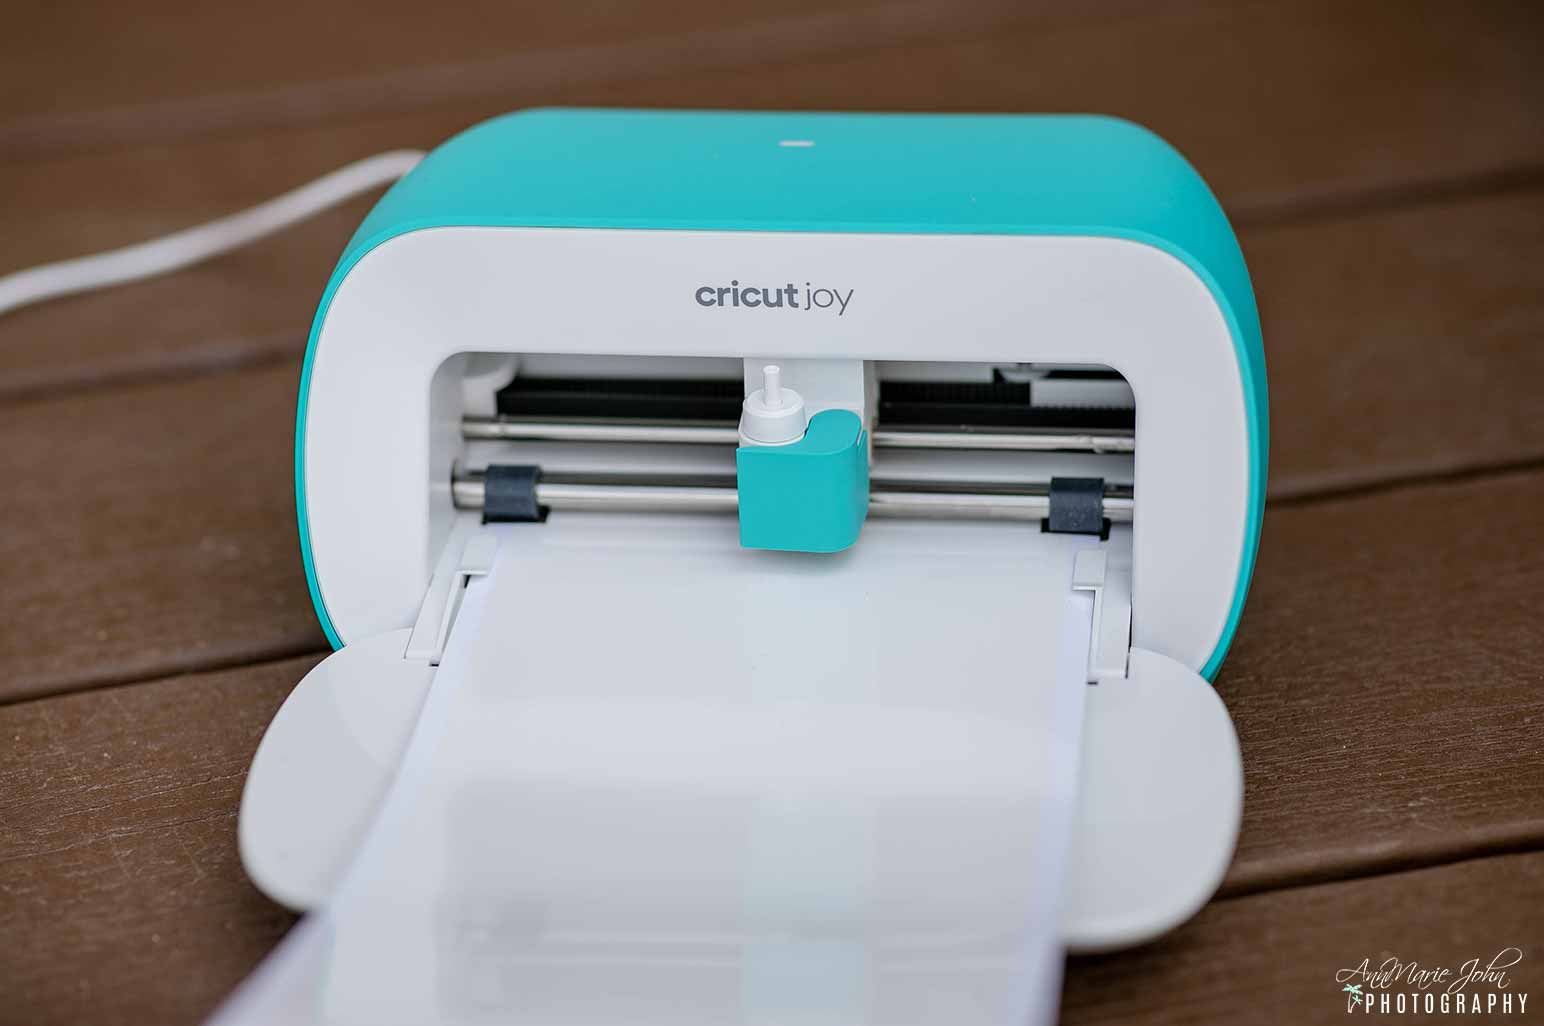
I did this entire project outdoors on my deck because the Cricut Joy is just so versatile and small enough that you can take it anywhere. Since it connects using Bluetooth connectivity, it can be used with either your smartphone or computer. All you need is Cricut Design Space and your imagination.

DIY Personalized Outdoor Mat
Here’s what you’ll need:
Outdoor mat (can be purchased at Target or Amazon)
Painters Tape
Light Grip Mat (optional)
Flex Seal Spray (Black)
Flex Seal Spray Clear Sealant

STEP 1: CREATE DOORMAT DESIGN
For this Hello/Goodbye doormat, I created a straightforward design in Cricut Design Space, which you can find here. If you’d instead create your own design, it’s rather easy as well. I would suggest measuring your mat and making your letters large enough for you to see them. For my design, I went with letters that were close to 4″ in height and 10″ wide for “Hello” and 13″ for “Goodbye.” You can, of course, size them however you desire, depending on the size of your mat.
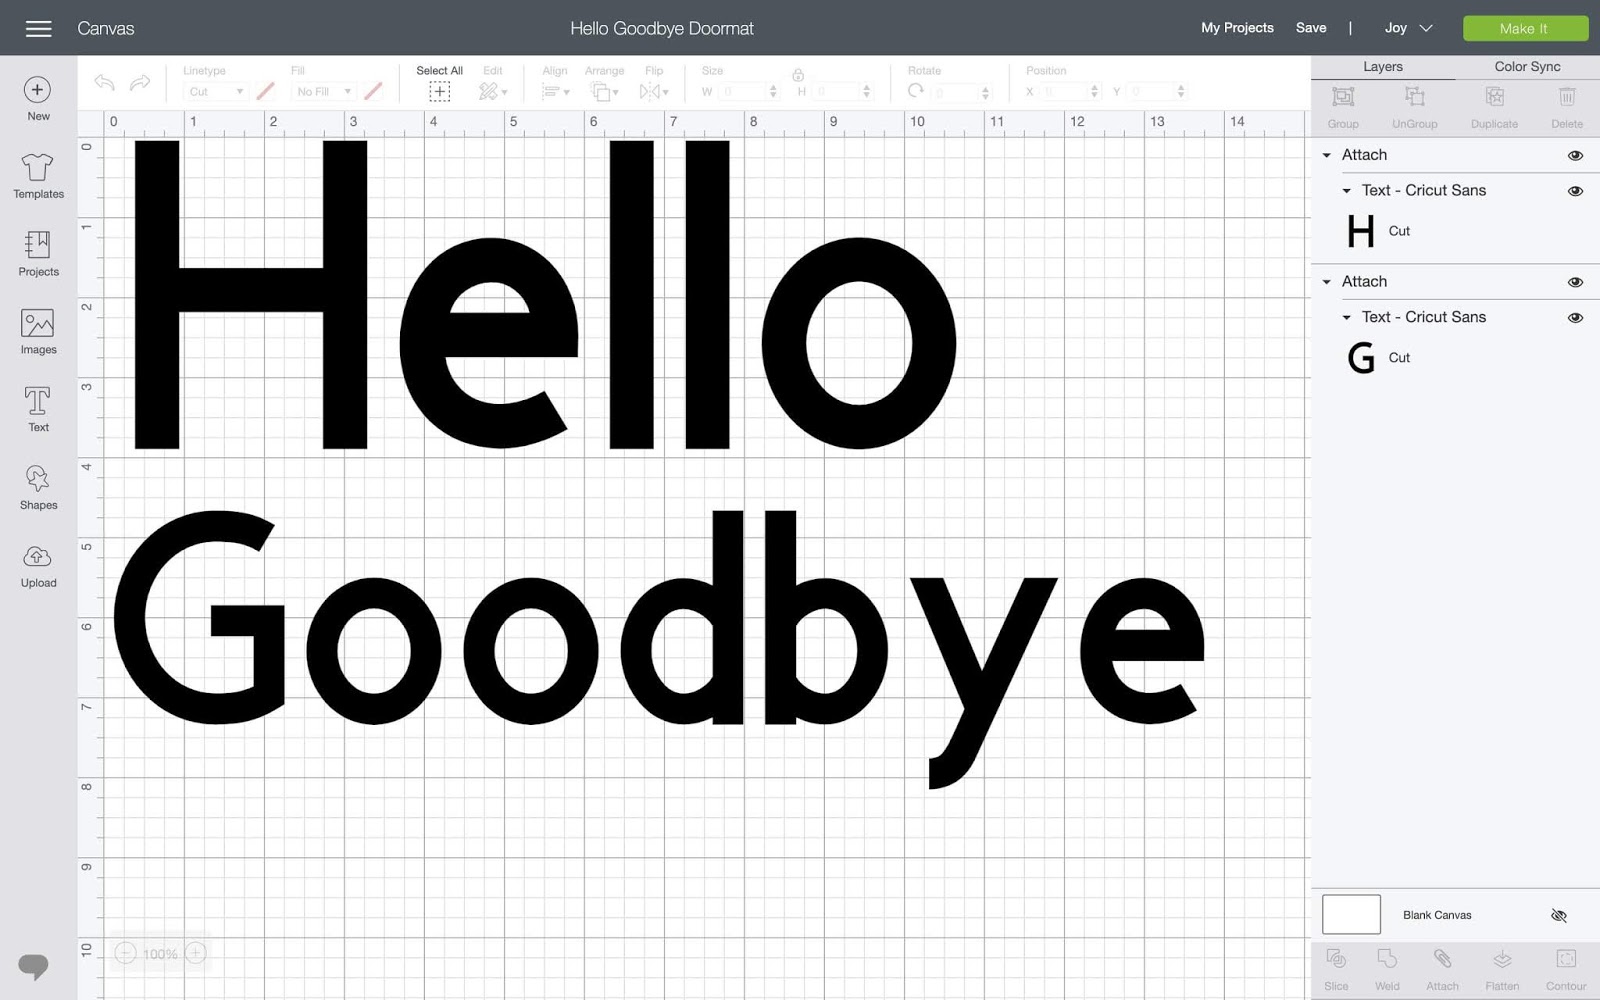
STEP 2: CUT YOUR DESIGN
The light grip mat is optional for cutting. I personally didn’t use it and instead, loaded my smart vinyl and had my Cricut Joy cut my design for me. Following the instructions on your screen, load your Cricut Joy with your smart vinyl, and cut your design.
STEP 3: APPLY YOUR VINYL TO YOUR DOORMAT
Once you’ve cut out your vinyl, simply place your vinyl on your doormat in your desired position. If you’re doing this exact one, this is how you’ll do it.
For Hello, remove the letters from your vinyl and place it on your mat, just as you would if you were planning on making a tee. However, you won’t be able to use your transfer tape. Simply eyeball it and line them up as best as you can.
For Goodbye, weed your design and place the weeded vinyl on your mat. Remember to add the small pieces from the O, D, B, and E.
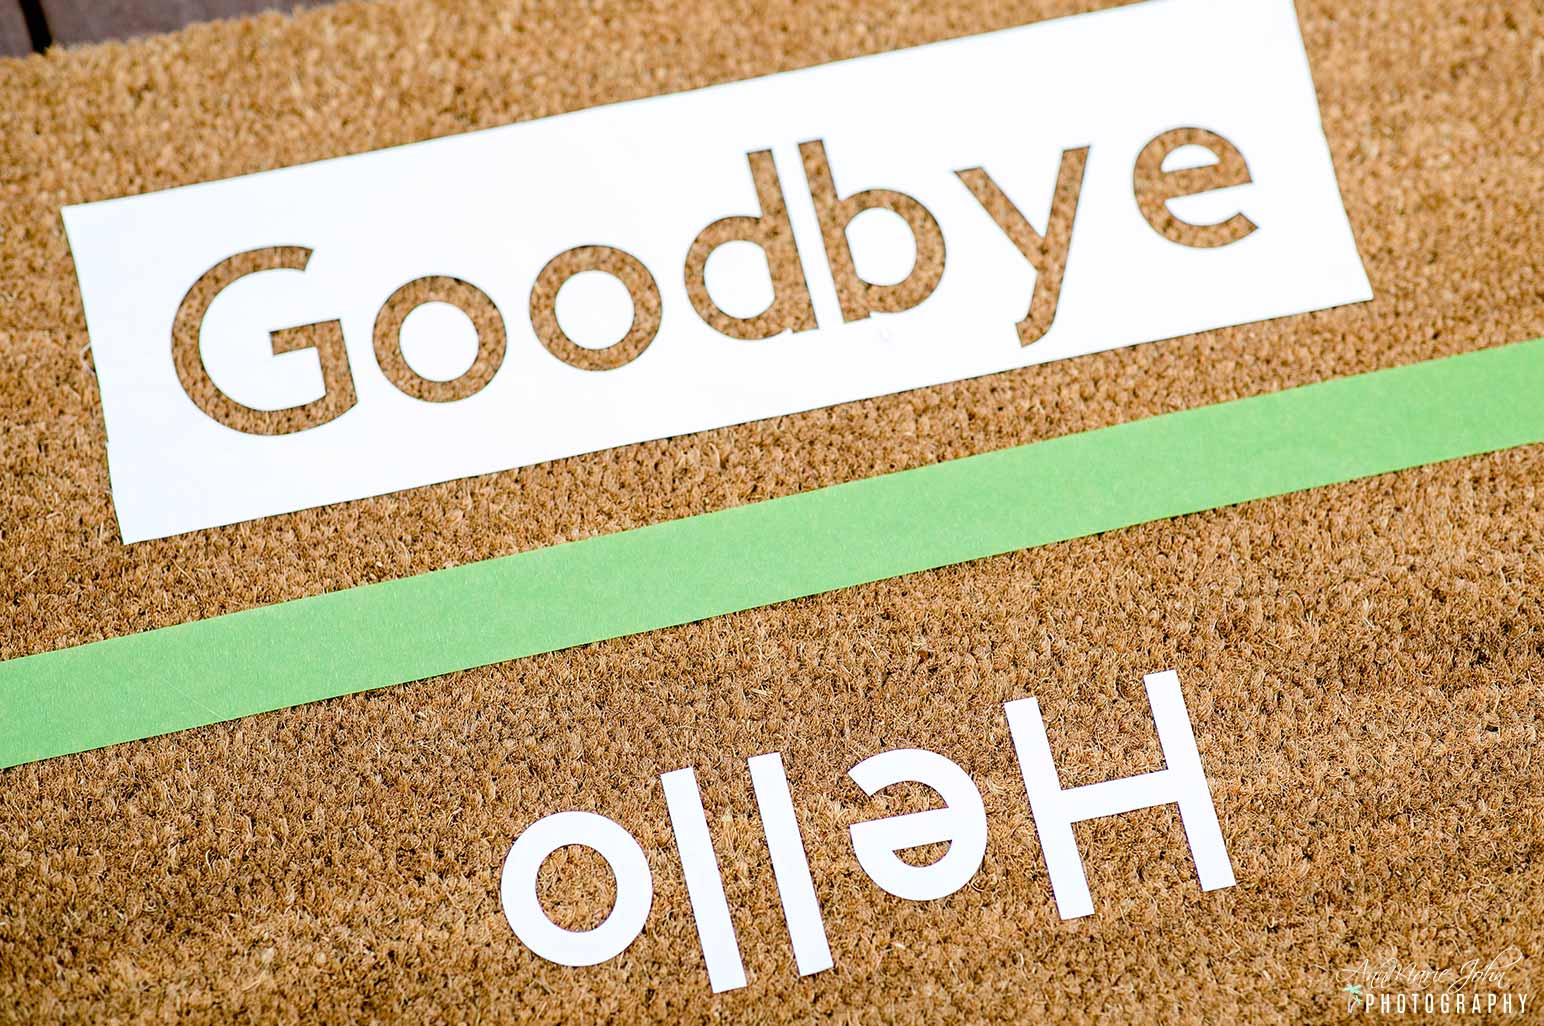
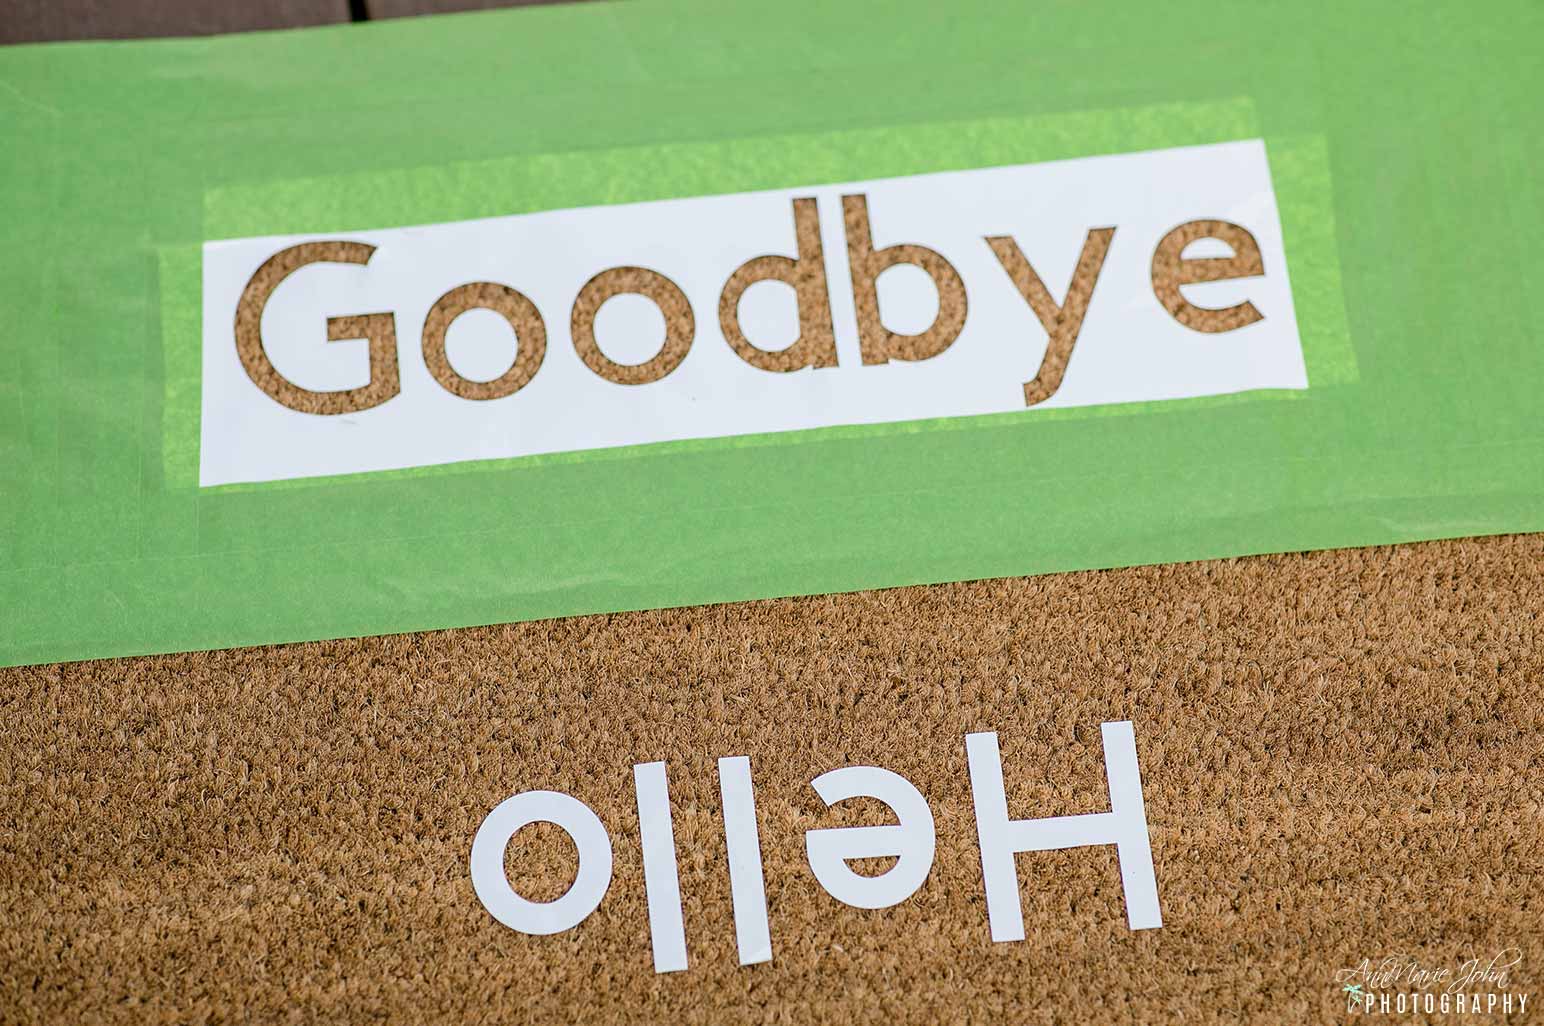
STEP 4. COVER WITH PAINTERS TAPE
Cover your Goodbye with painters tape, as seen in the photo below. That will ensure that your paint won’t seep over unless you want your entire mat to be black. In that case, you would use the letters from Goodbye the same as you did with Hello.
Or if you’d prefer your Goodbye to be all black, reverse it. Simply use the letters from Goodbye and the weeded vinyl from Hello as your stencil.
STEP 5: PAINT YOUR DOORMAT
This step is super easy. Simply spraypaint your mat. Protect surfaces that you don’t want the paint to get on. I suggest spraying with 2 coats for even distribution. Spray your first coat and let sit for a few minutes then spray again. Once you’re done, let dry. Flex Seal generally takes anywhere from 2-3hrs to dry.
STEP 6: SEAL YOUR DOORMAT
Once your mat is dry, keep the painters tape on, and spray with your flex seal sealer on the painted areas. Your sealer will ensure that the life of your doormat lasts longer. However, the longevity of your mat will ultimately depend on your traffic area and the elements to which it is exposed. If it’s in a high-traffic area, it won’t last as long as a low-traffic area, and it’ll last longer if it’s sheltered as well.
STEP 7: SHOW OFF YOUR NEW DOORMAT
Once your mat is dry, it’s now time to show it off! You’ve done a great job and can now create mats with your Cricut Joy. The possibilities are endless in what you can create.
I can’t wait to share all the other things that I can do with my new Cricut Joy.
SAVE THIS DIY PERSONALIZED OUTDOOR MAT TUTORIAL TO YOUR FAVORITE BOARD ON PINTEREST!


