
Are you looking for a quick and easy project to do with the kids when they’re on their holiday break? Then our sock snowman is just the thing you’re looking for, and what makes this even better is that you can get all your supplies from your local dollar store.
🎶 Do you want to build a snowman? ⛄️ 🎶
Frozen

Here in Colorado, we usually start experiencing snow at the beginning of November, right after Halloween. However, this year has been a bust, and it might be quite a while before we see snow as it’s been in the high 60’s and 70’s the past couple of days. However, the snow never really lasts long enough for us to build an actual snowman, something Madison has been yearning to do for quite some time, so we decided to do the next best thing.
It’s been quite some time since I updated my site with a craft project, and it’s not that we didn’t want to. Many projects have been in the works, but I’ve simply been procrastinating, and much of it has been put on hold. A few weeks ago, Madison and I took a trip to our dollar store, picked up some crafting supplies, and decided to make sock snowmen, something that I made with my older kids when they were younger. These are so easy to make and can be used as decor around the home as well.
I’ve started decorating for Christmas. I got rid of my Halloween and fall decor as soon as Halloween was over and jumped right into Christmas. I’m currently waiting on a few more holiday decor so we can get the tree decorated, and then we’ll be officially done. It just seems that the holiday decorations seem to hit the stores earlier and earlier each year, and I’m here for it! Christmas is by far my most favorite holiday, and this year will be no exception.
But in the meantime, since we’re without snow but still in the holiday spirit, here are our Sock Snowmen.

DIY Sock Snowmen
Supplies Needed
Socks (Chenille & Tube Socks)
Rice
Googly Eyes
Orange pipe cleaners
Rubber bands (crochet thread optional)
Decorations (stickers, buttons, ribbons, etc)
Scissors
Glue/Glue Gun

Directions
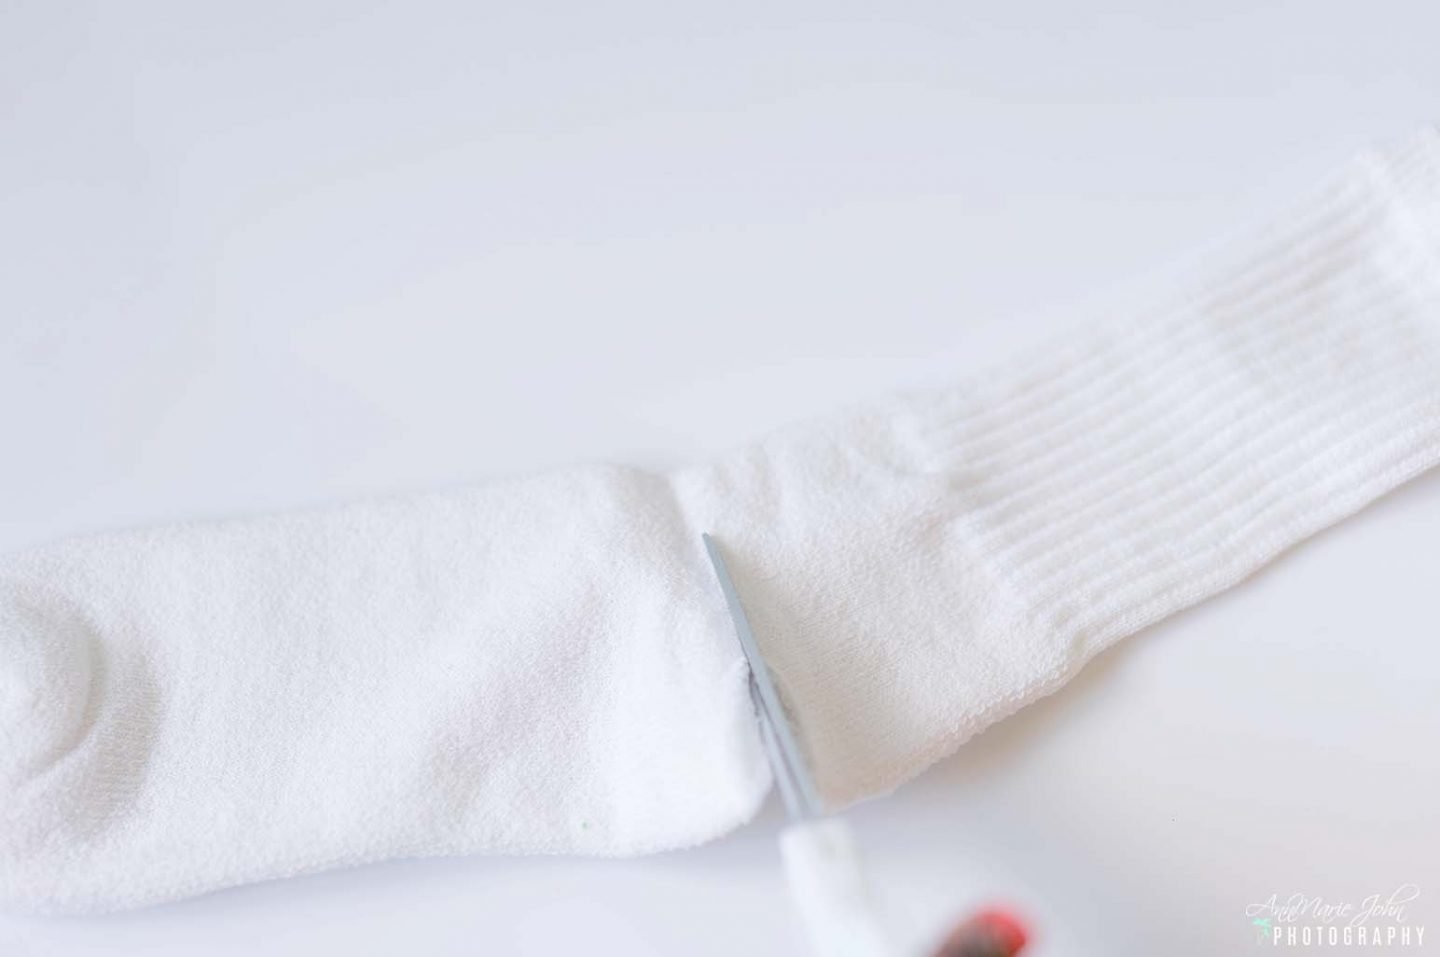
- Cut your tube socks slightly above the heel as shown below.
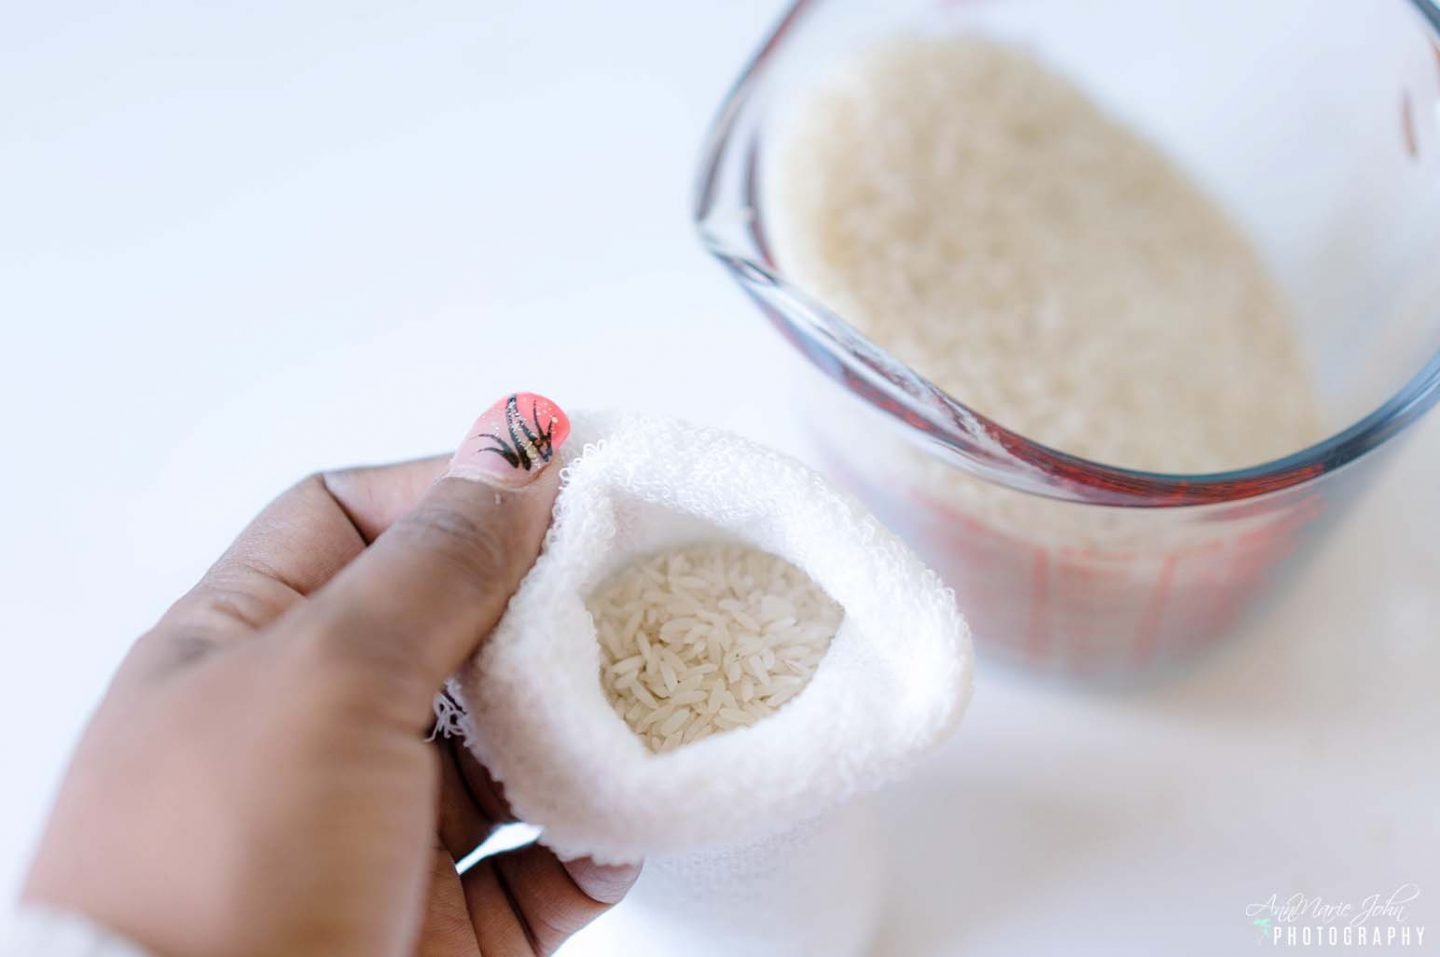
- Fill with rice as close to the top as possible.
- Seal the top with rubber bands. (For a more secure closure, you can also tie it once again with crochet thread.) I also cut off the excess that might have been a bit too bulky when it was time to place the hat.

- Put another rubber band close to the middle of your filled sock. One half would be your head while the other half, the body of your snowman.

- Cut your chenille sock a little below the heel as shown in the photo below. This will be used as your snowman’s hat.

- Cut another two pieces from the sock to use as the scarf around his neck. You’re also going to cut one of the ends of a piece. To use it as a scarf, we pulled the intact one over his head and then slipped the cut one between it to make it look like a scarf. (see finished photo on step 9)

- Add your eyes (If they’re the adhesive kind then you can simply stick them on. However, if they aren’t simply secure them with glue. I got my glue from the dollar store along with all my supplies, and decided that using my glue gun was a bit more secure.)
- Cut a little piece of the pipe cleaner and stick it in the sock to represent his nose.

- Finish his outfit with your decorations. I used two gem stickers on his body to bring his look together.

Note: You can make your snowman fragrant by adding a few drops of your favorite essential oil with your rice. Peppermint is always a great choice for the holidays.

And this is the finished result of our sock snowman. It’s really simple and takes less than 20 minutes from start to finish. Get the kids involved in this project and remember, no two snowmen will ever be the same.
