
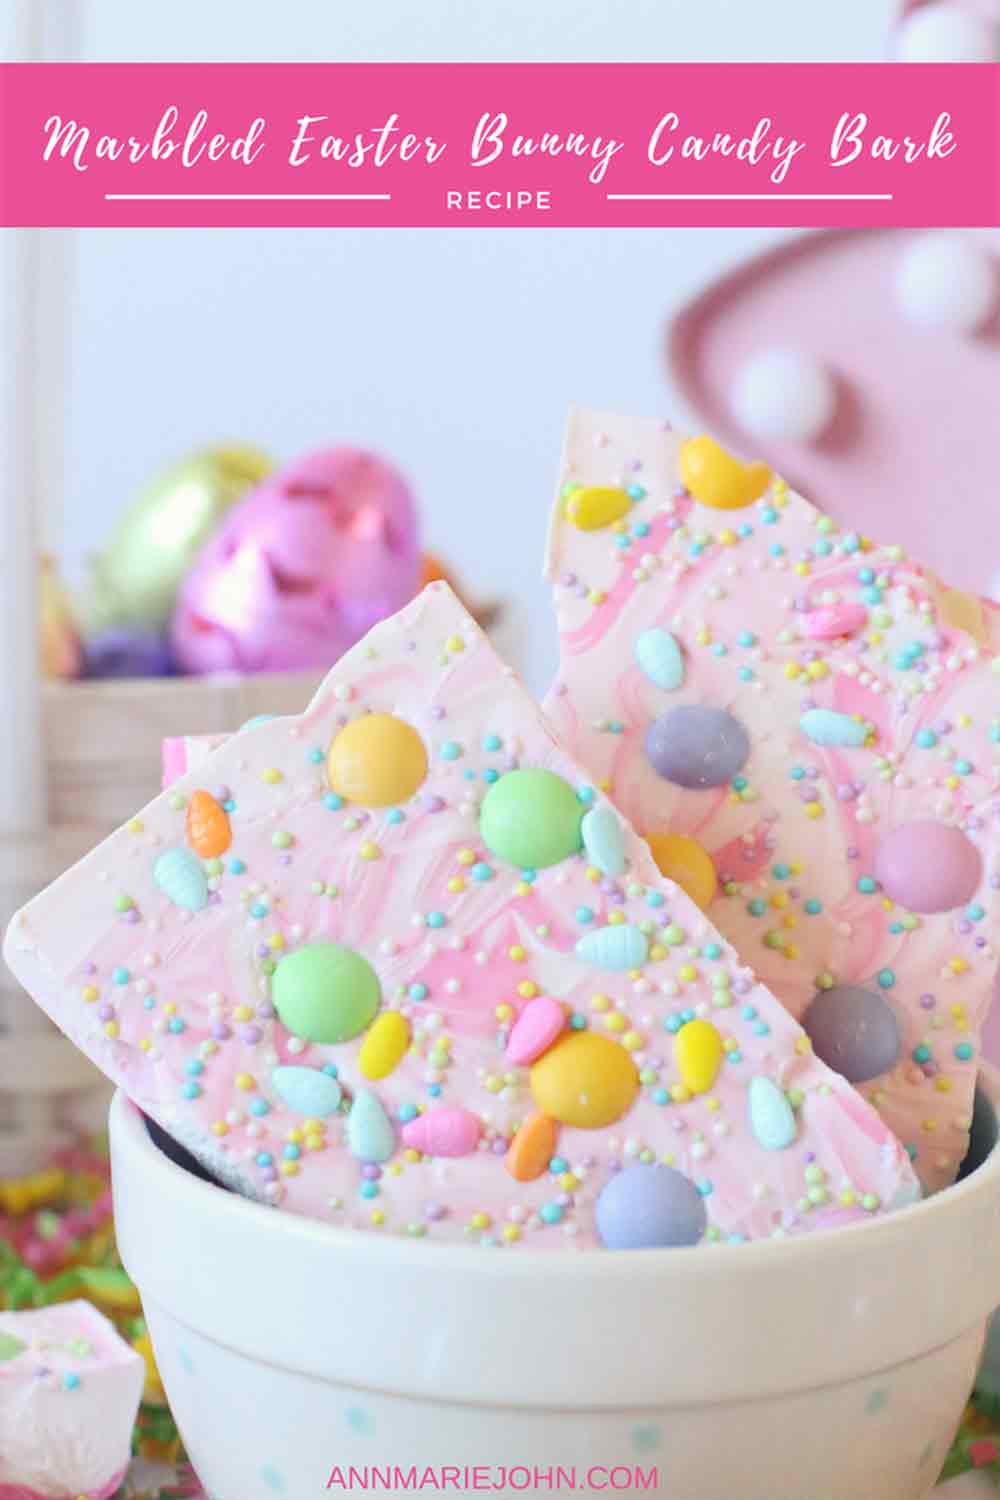
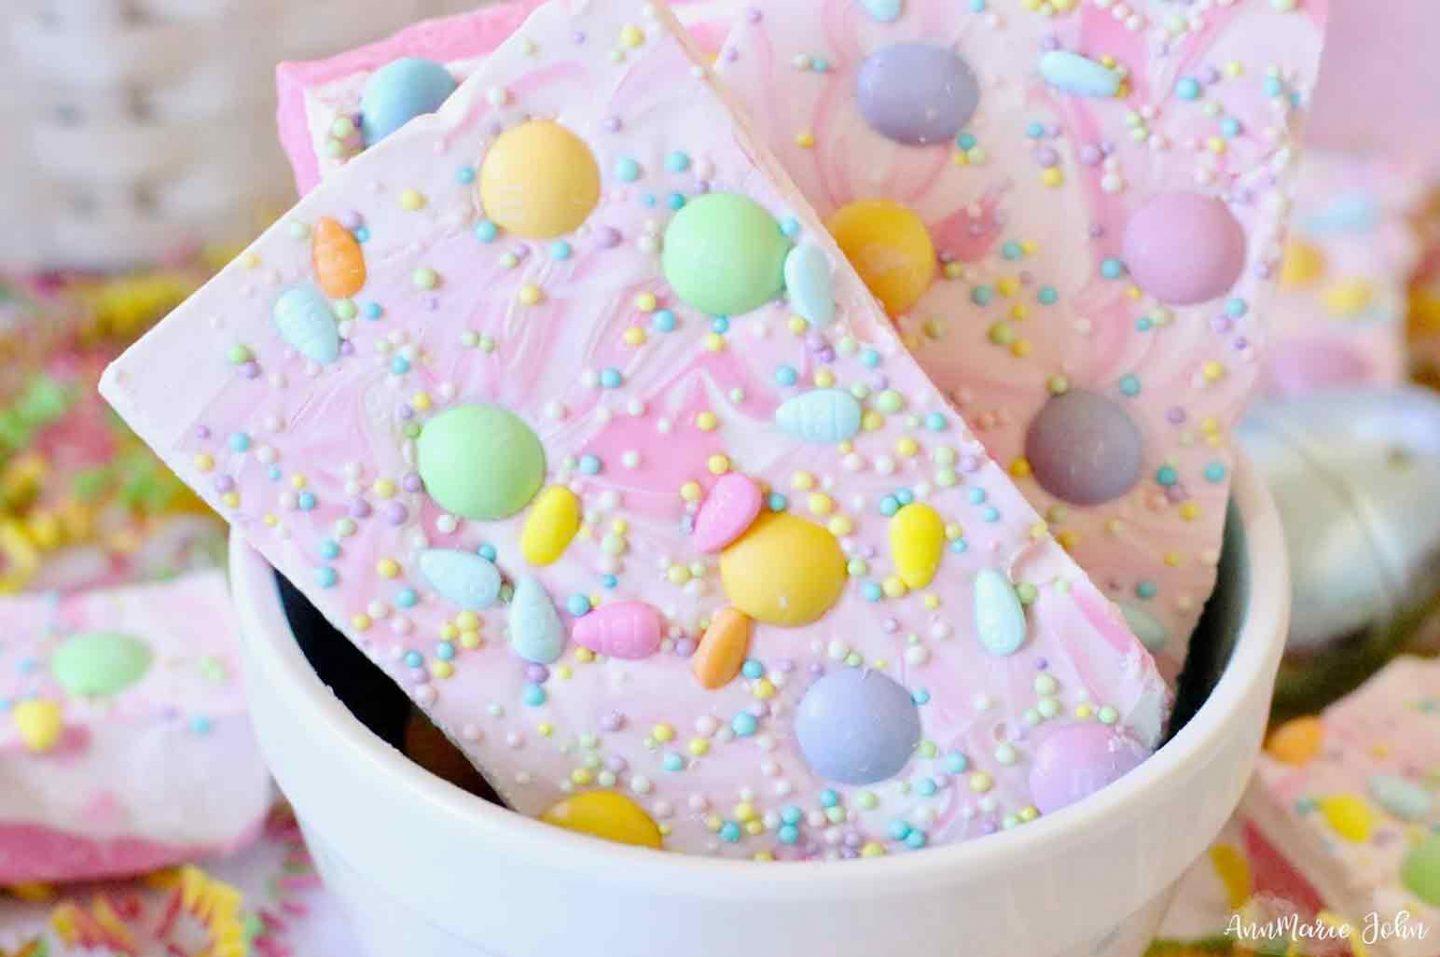
Our Marbled Easter Bunny Candy Bark not only entices but delights as well.

Once again, another recipe has made its way onto the blog. Another recipe that was never intended to be seen, but after making it, Madison and I thought that it was too good to not share with the world. As you know, I love being in the kitchen, but I also like simple recipes that don’t take all day to make. Sweets and treats are just one of the many things that you can make in your kitchen in a very minimal amount of time.
With my Easter crafting on the back burner, I still had quite a few Easter M&M’s that I used with our Easter Bunny Candy Jars, and instead of just eating them, like I wanted to, I decided to make this marbled easter bunny candy bark. FYI, if you haven’t tried these limited white chocolate Easter M&M’s, you’re not “living the life”, as my son likes to say. Then again he also says that my recipe is diabetes just waiting to happen, with chocolate on chocolate and sprinkles too. You be the judge.
Marbled Easter Bunny Candy Bark
Ingredients:
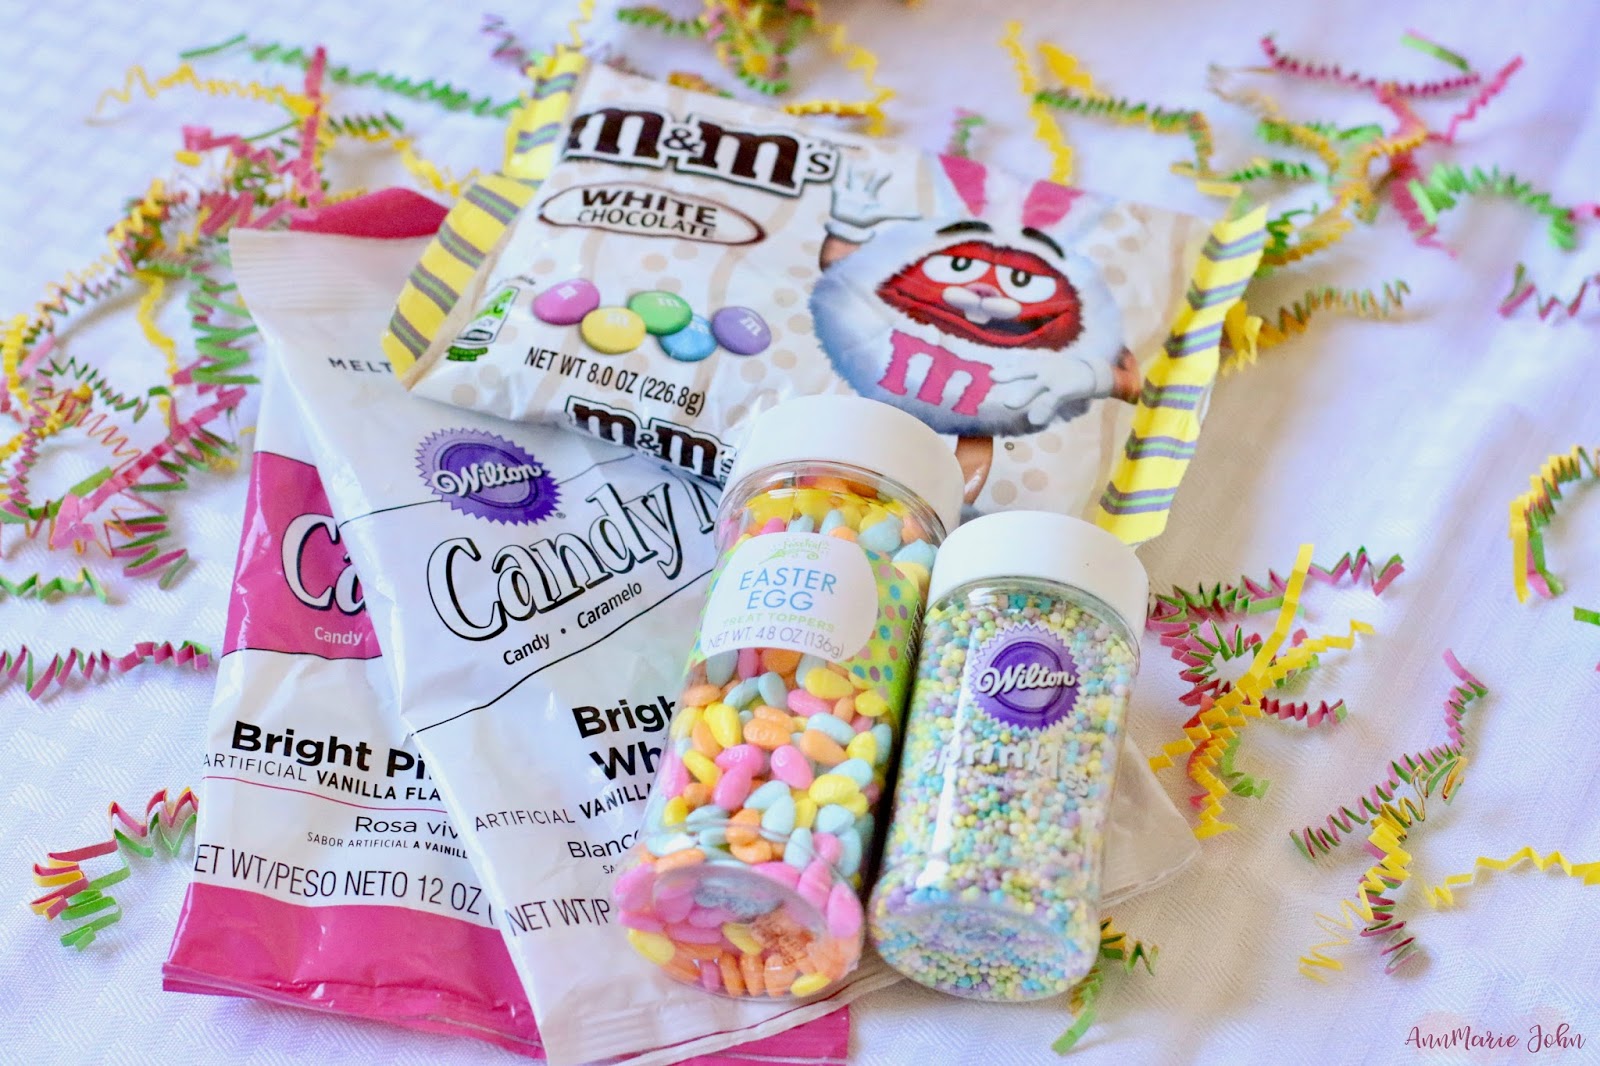
12oz bag of Wilton bright pink candy melts
12oz bag of Wilton bright white candy melts
8oz package of white chocolate Easter M&M’s
Assorted Easter themed sprinkles
Supplies Needed:
Microwavable safe dish or non-stick stovetop pot
Parchment paper
Cookie Tray
Directions:
Step 1: Line your cookie tray, dish, or whatever you’ll be using with your parchment paper. You’ll need it for step 3.
Step 2: Pour out your pink chocolate melt in a microwaveable dish. Save a few of the melts for later. Melt your pink chocolate in the microwave, stirring every 30 seconds until fully melted. For this, I used my stovetop and a nonstick pot which made the process so much easier. I stirred until it was thoroughly melted and all lumps removed.
Step 3: Pour your melted chocolate onto your parchment paper and spread it into your desired shape. Put aside so that it can cool. You can place it in the refrigerator for about 10 minutes to speed up the process.
Step 3: Now melt your white the same as you did your pink. Your pink should be cooled by now. Pour your white chocolate on top of the pink for an added layer.
Step 4: The few pink pieces that you saved in step 2, melt those, and then pour on the white swirling it around to give it a marbled look.
Step 5: Decorate with your Easter M&M’s and assorted sprinkles to give it that Easter look.
Step 6: Allow your bark to cool and set. You can once again speed up the process by placing it in the refrigerator. Once it’s completely set, break it apart into pieces. You can break them as small or as big as you want.
Notes: You can store your bark in the refrigerator for up to 3 weeks.
